Outside of Card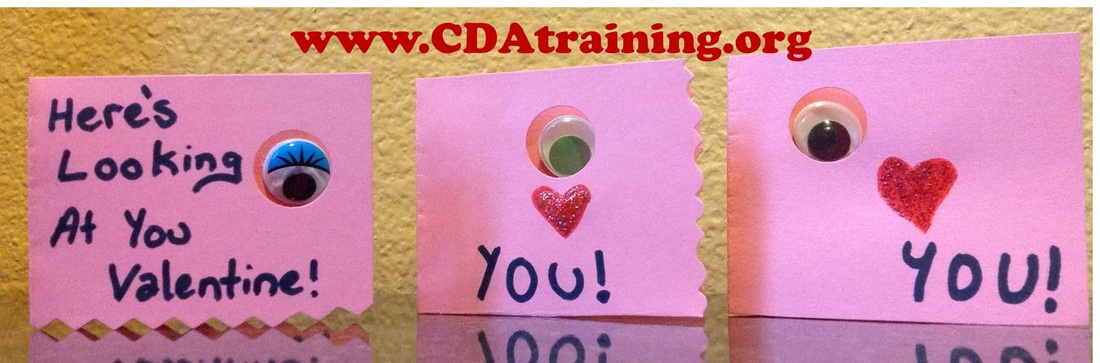
Inside of Card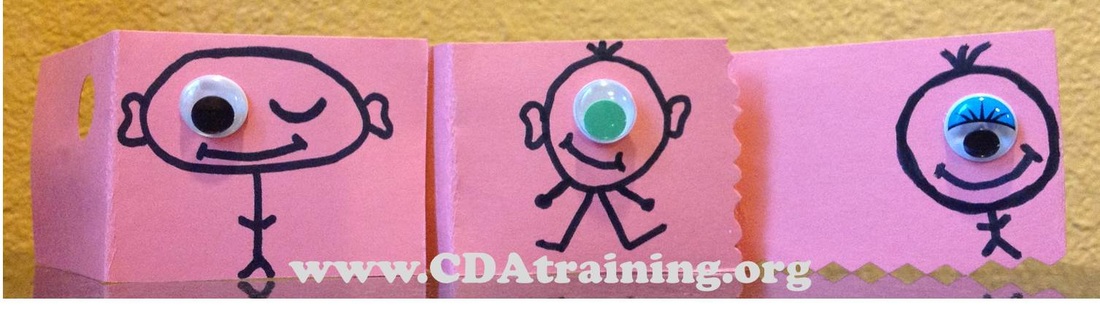
Supplies Needed; Wiggly eyes, markers or crayons, glue, scissors, a large hole punch, and construction paper.
Directions; Cut construction paper to desired size for card. Punch a hole in the middle (or off center) of the card. Write on the front of the card, you can use one of the examples (seen above) or you can make up your own. Inside the card, glue on the wiggly eye, so that it appears to be looking out of the punched hole. On the inside of the card, draw a monster or creature around the wiggly eye.
0 Comments
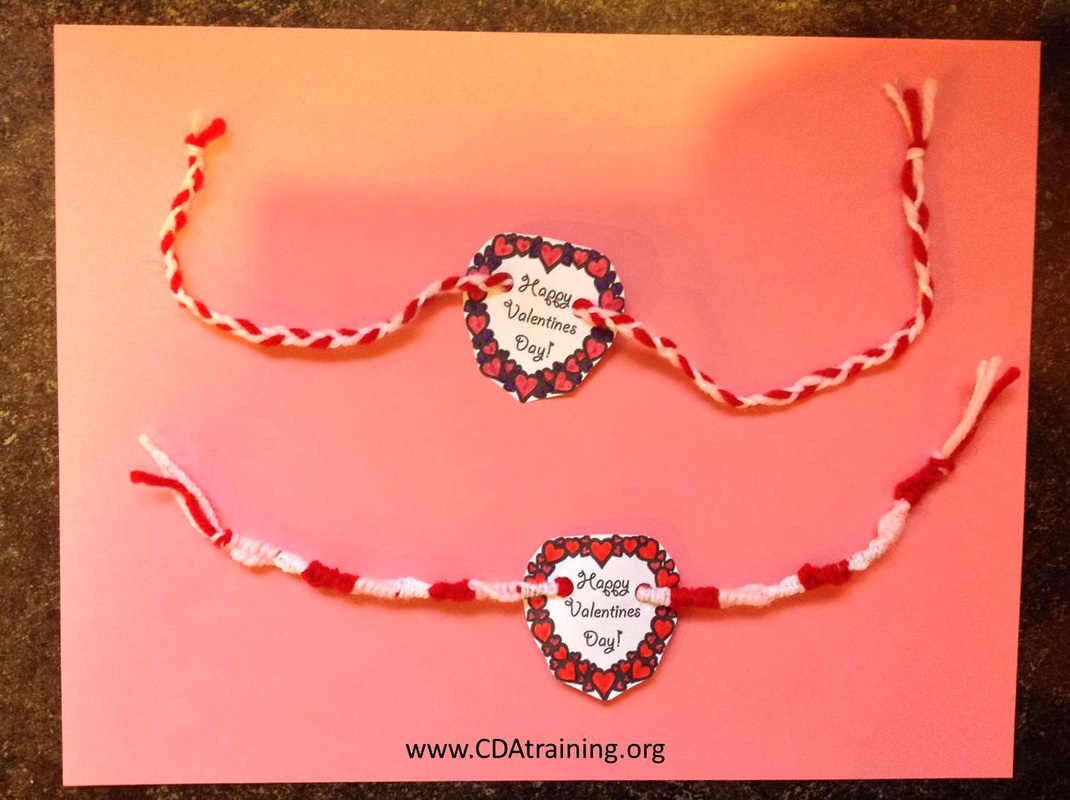
Here is an easy one. We braided yarn and made bracelets, then colored and hole punched the template (seen below), then threaded the bracelet through. 
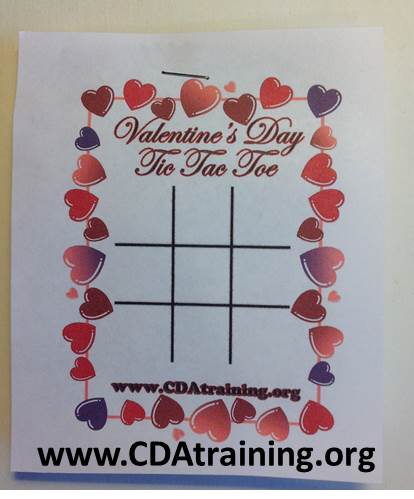
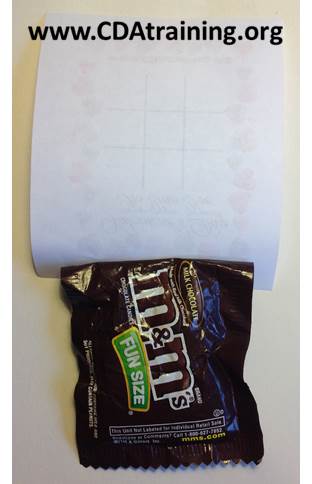
Supplies needed; Print out of template (below), M&M Candy, and a stapler Directions; Print out template (below), and cut out each game. Staple 1 bag of M&M Candy to each game. 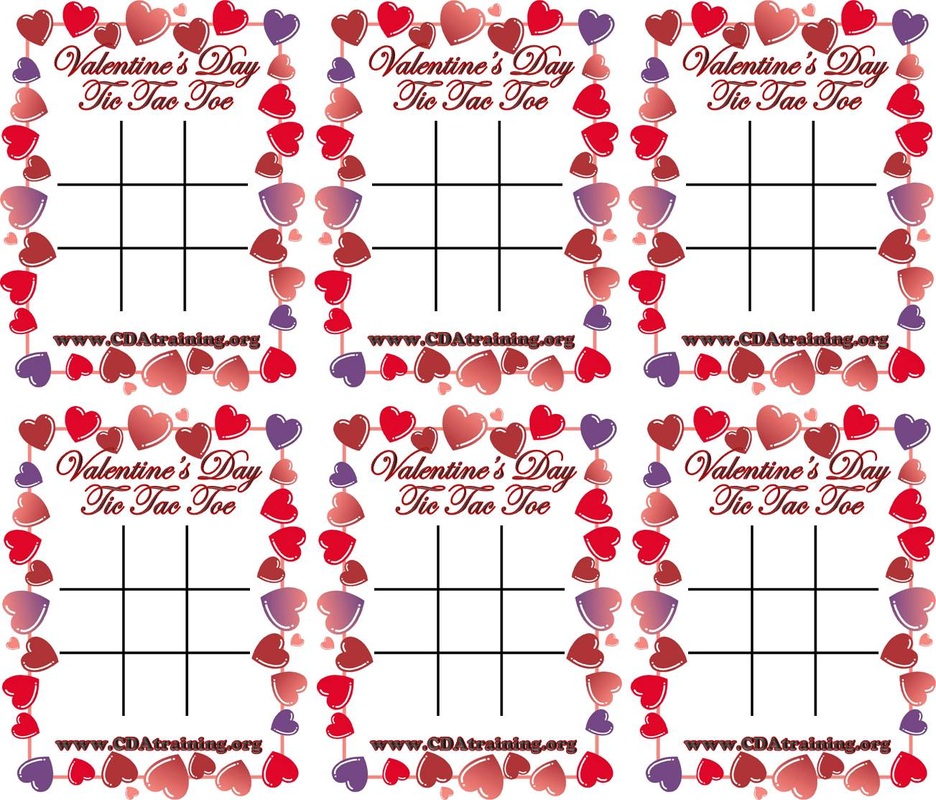
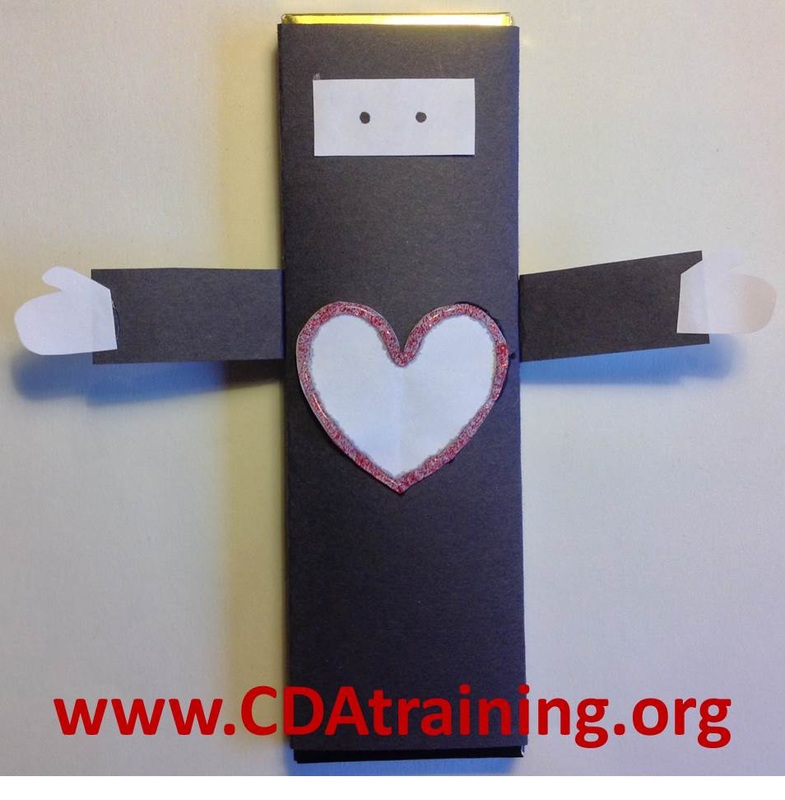
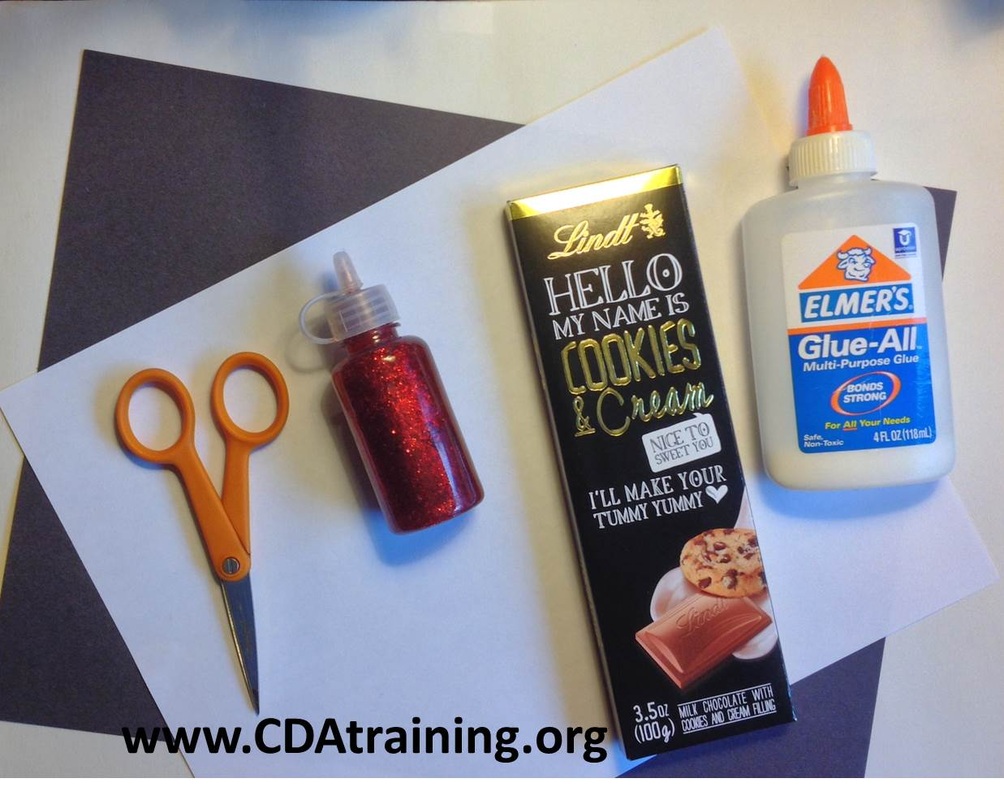
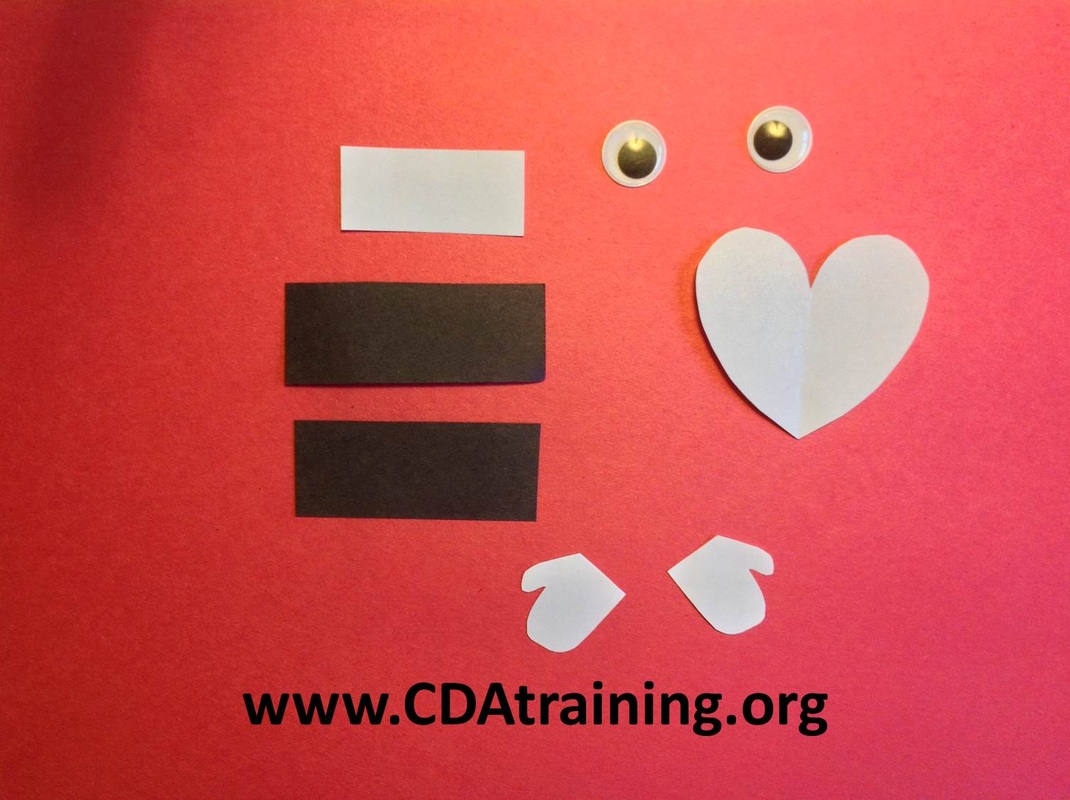
Supplies Needed;
Directions:
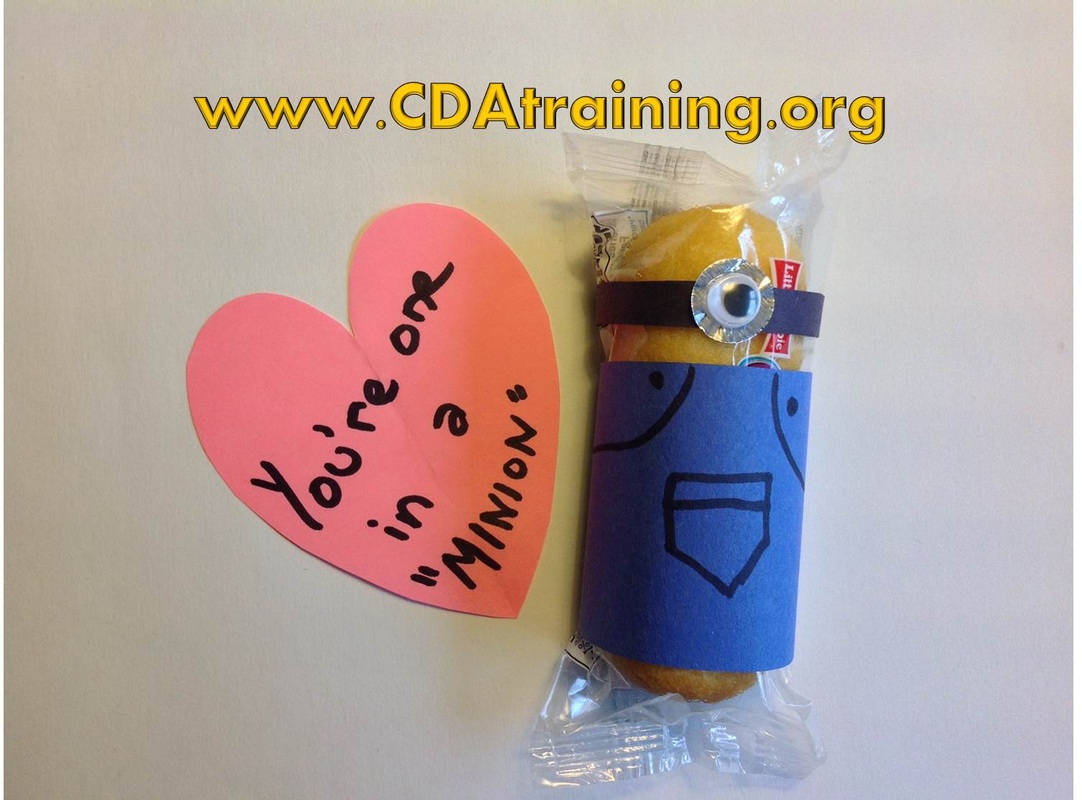
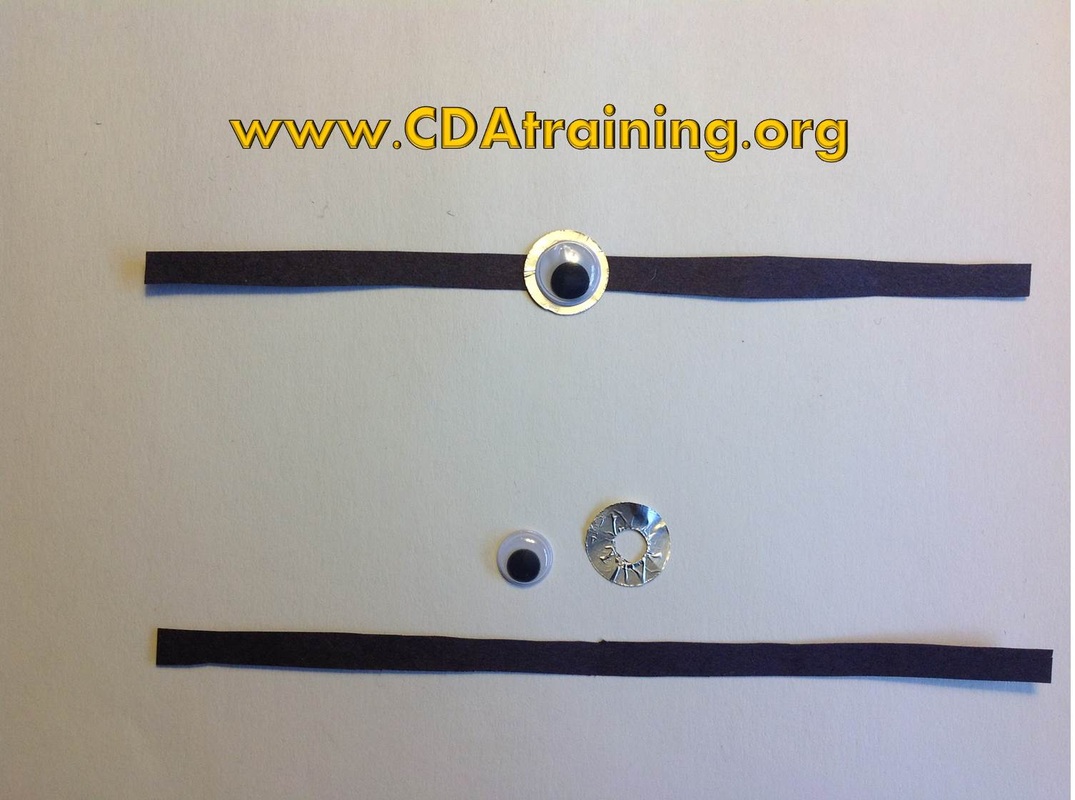
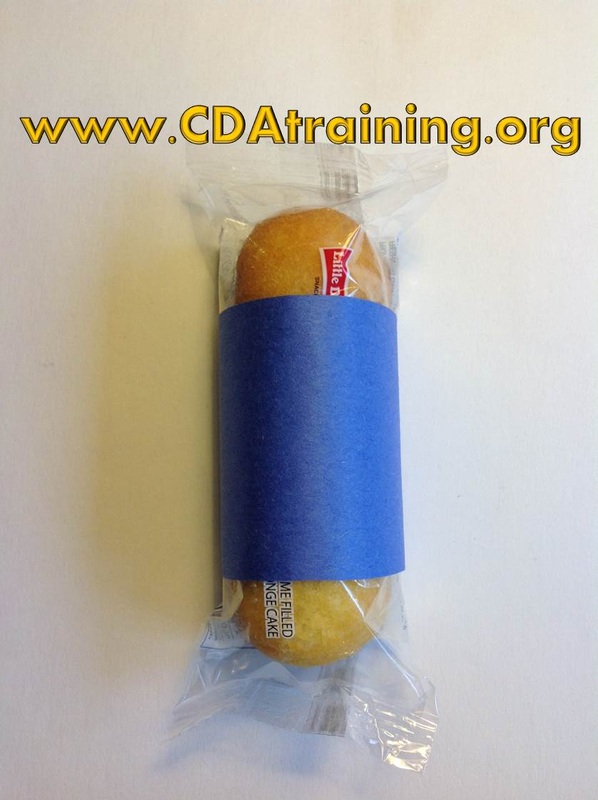
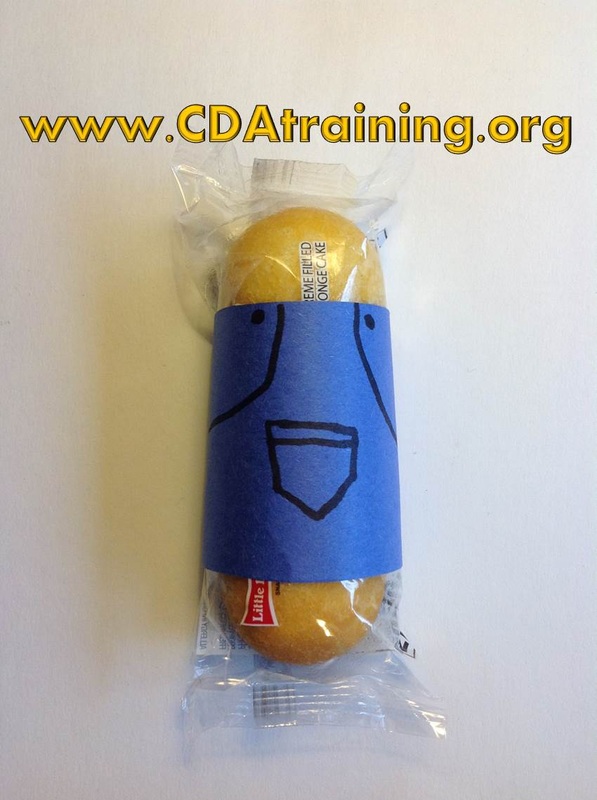
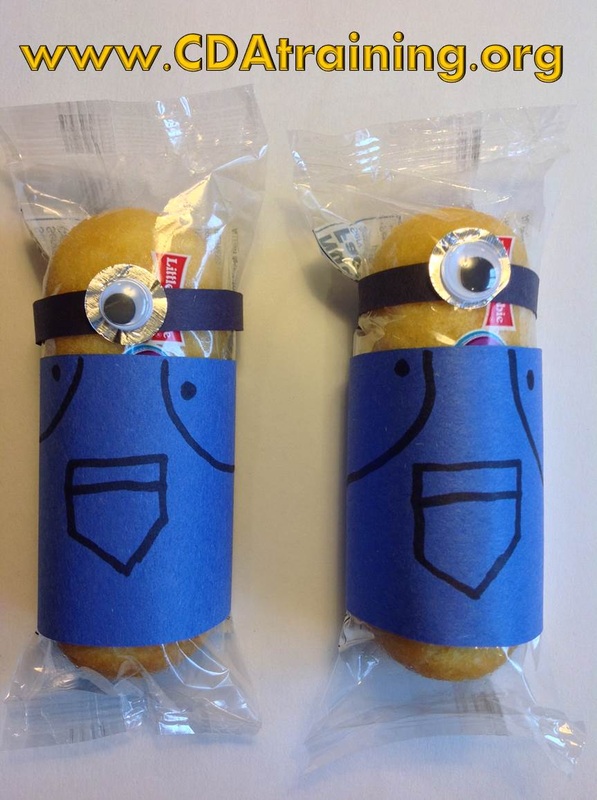
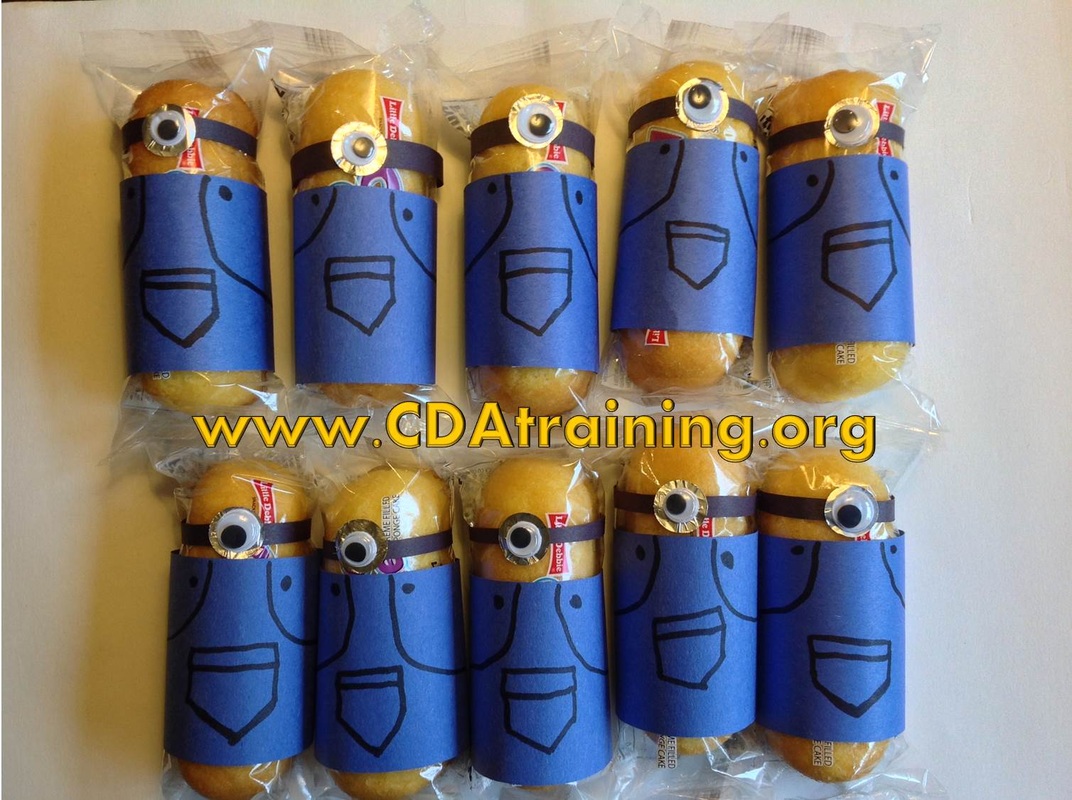
Supplies Needed; Twinkies, black construction paper, blue construction paper, wiggly eyes, tin foil, glue, scissors, Hole punch, and Large hole punch Directions; Cut a rectangle out of blue paper and wrap it around the bottom of the twinkies to make the minion's overalls. Then cut a black strip of paper and glue it on the top to resemble their goggles. Stamp out circles of tin foil and tape them to the black strip. Next add some big wiggly eyes and decorate the overalls. 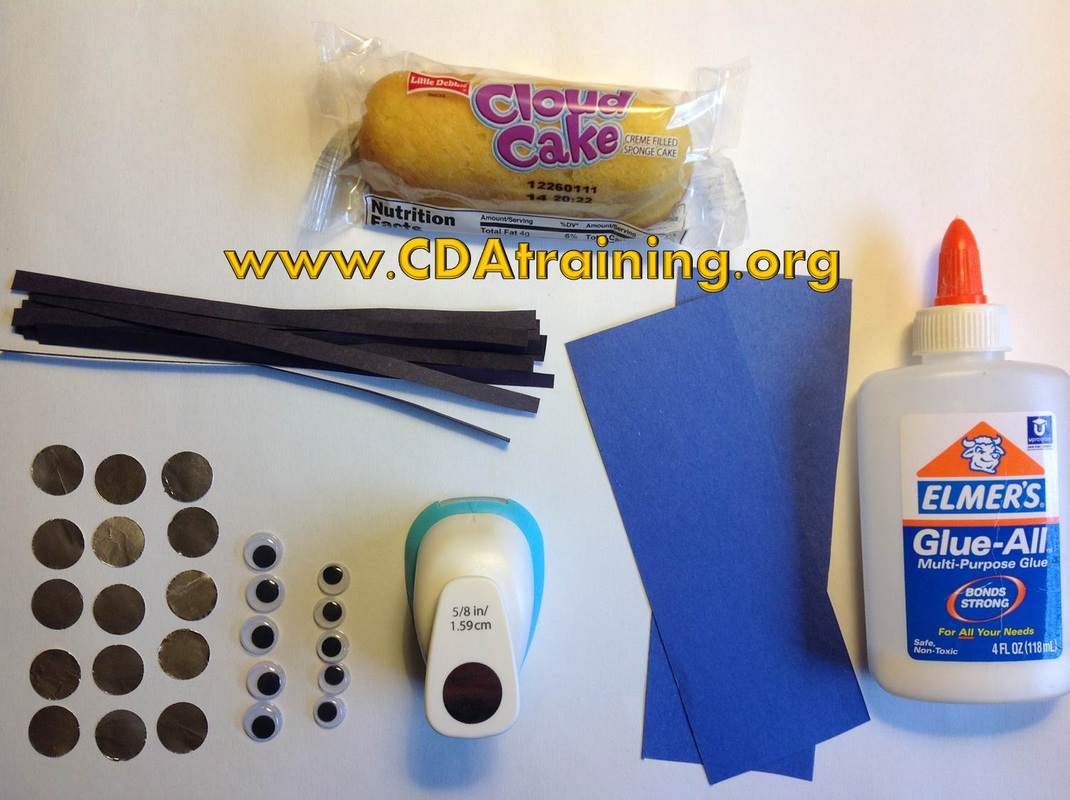
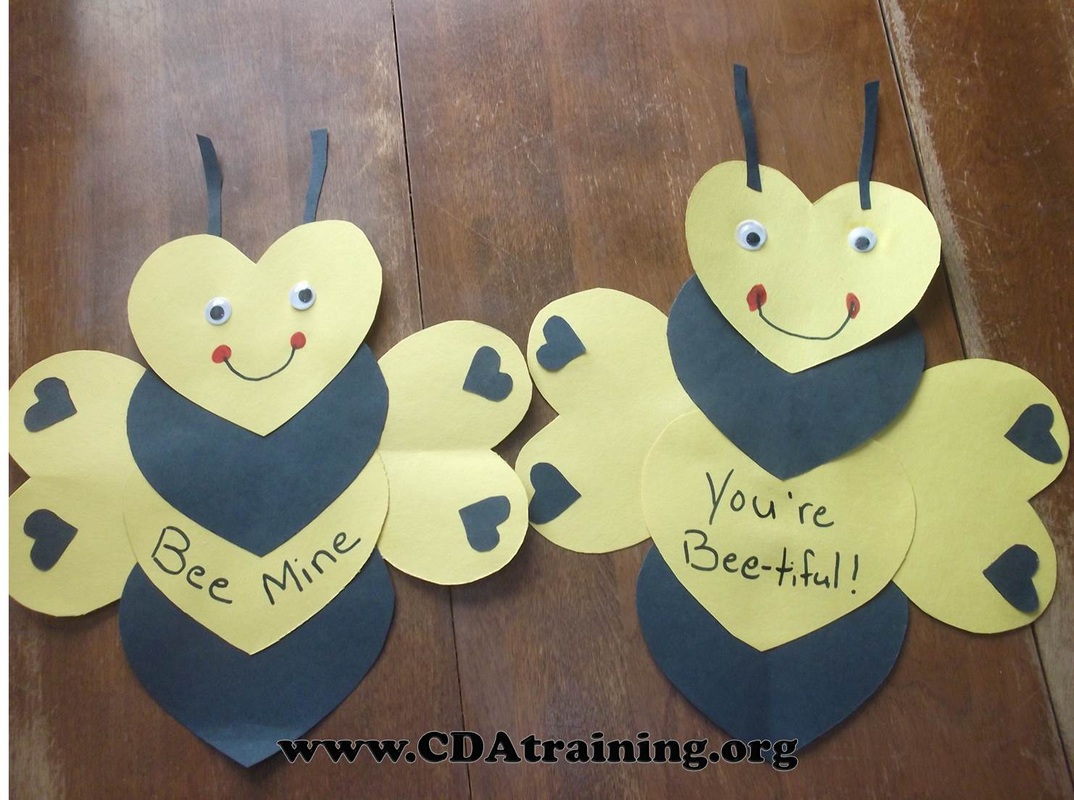
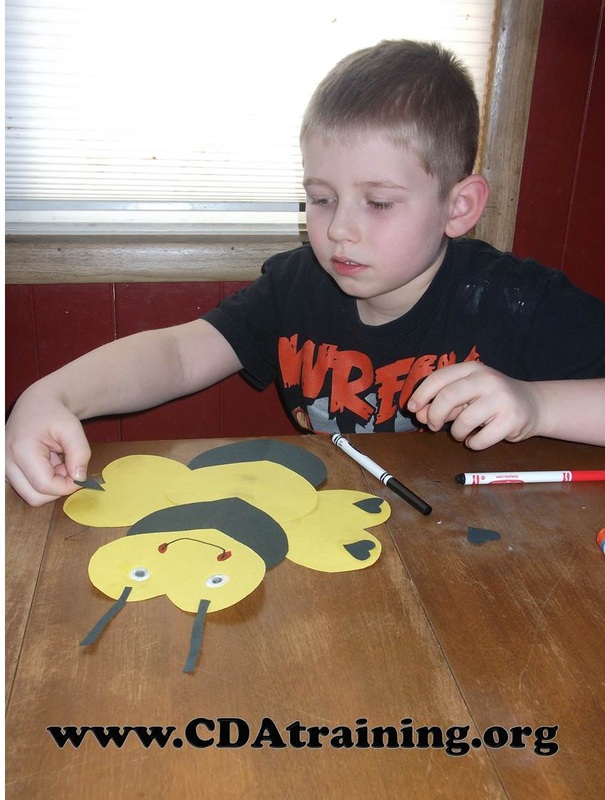
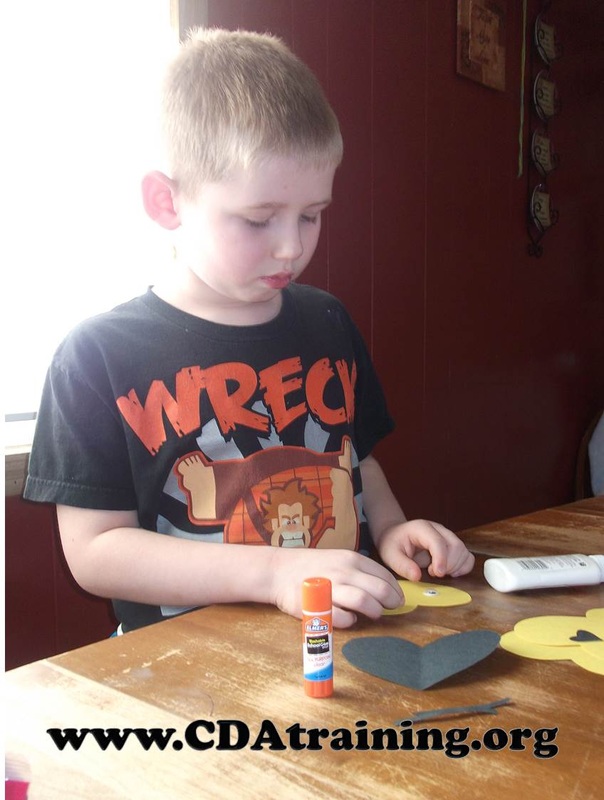
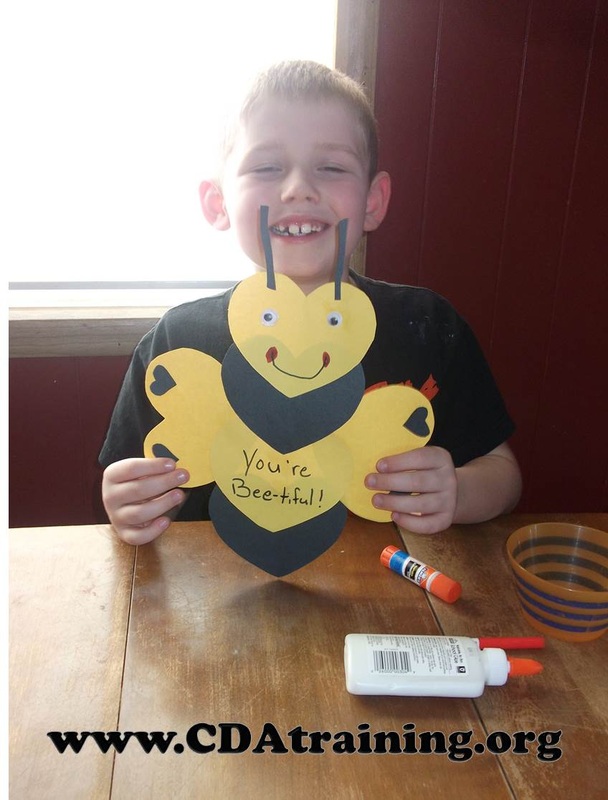
Supplies: · Construction paper- yellow and black · Heart tracers · Glue · Scissors · Googley eyes · Markers Directions: Trace and cut out 4 yellow hearts and 2 black hearts of the same size. Trace and cut out several small black hearts and 2 black antennas. To create the bee body glue together in order slightly above each other yellow heart, black heart, yellow heart, and black heart. Add a yellow heart to each side with the point of the heart being glued to the back of the bee body for wings. Glue a few smaller black hearts onto front of each wing. Glue antennas to the first yellow heart. Glue googley eyes to front of the first yellow heart. Use markers to add other details and a special “Bee” message. We used the messages “Bee Mine” and “You’re Bee-tiful”.
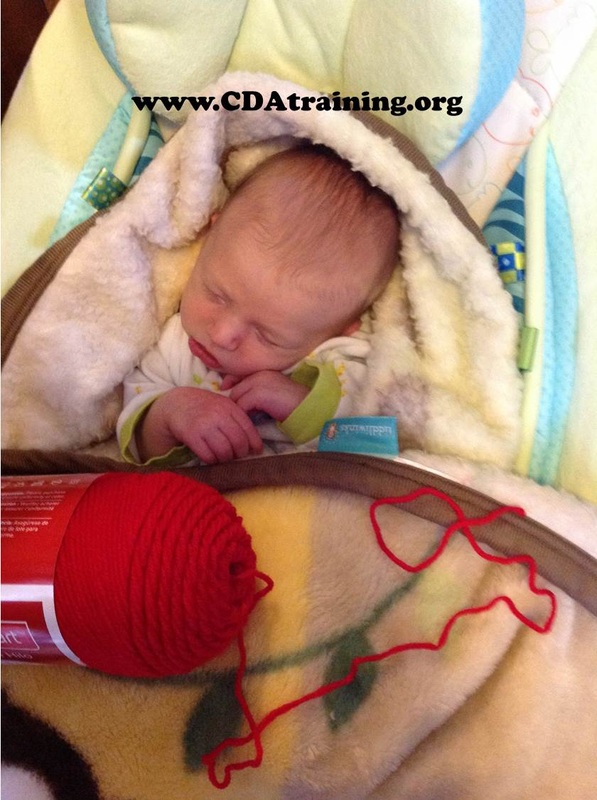
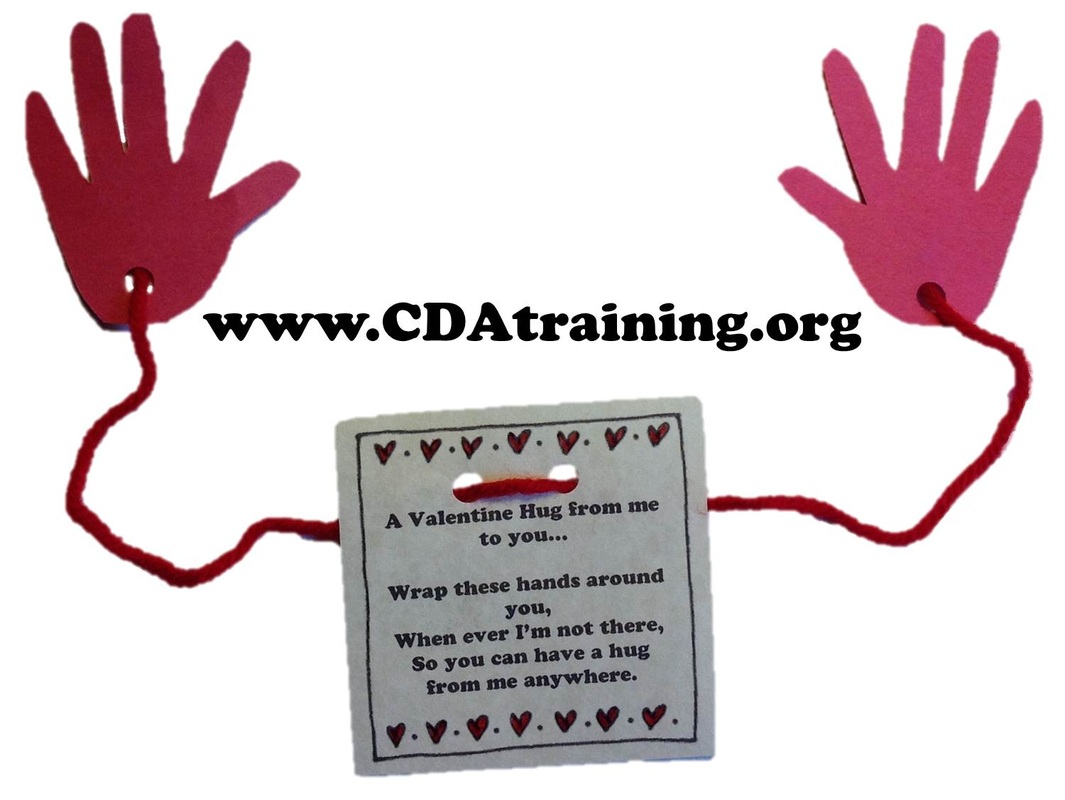
This project would be perfect for deployed military parents or family members and friends living far away. 
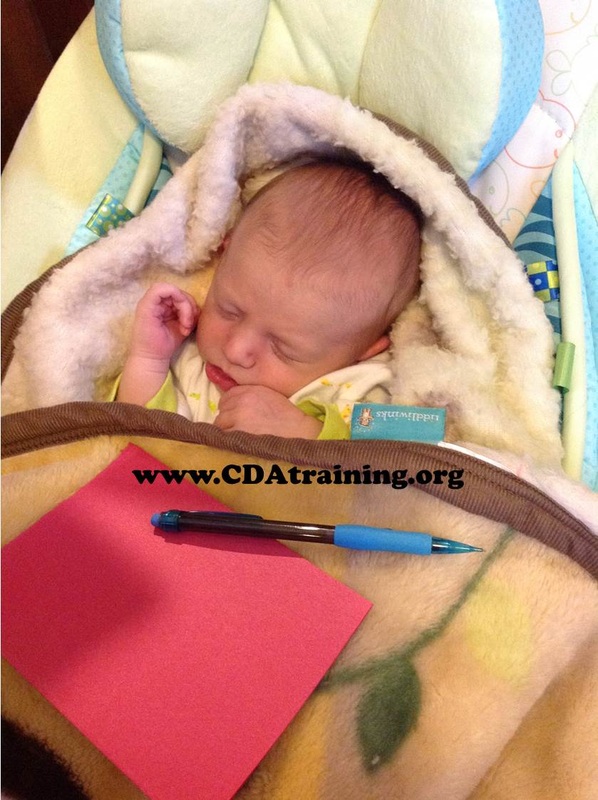
Supplies Needed; Print out of template (below), red yarn, red construction paper, glue, hole punch, and scissors. Directions; Using the red construction paper, fold it in half and trace child's hands (using a pencil). Cut out the hand outline (the fold will allow for 2 hand shapes to be made). Use your hole punch to put one hole in the palm of each hand. Next take the red yarn and measure the child's "wingspan" (from palm to palm, across their chest). Print out the template (below) and decorate as desired, once decorated, use the hole punch to put two holes in the top of the decorated template. Now thread your "wingspan" yarn through the decorated template, and through the holes of each hand and glue ends to back of palm. Allow to dry. 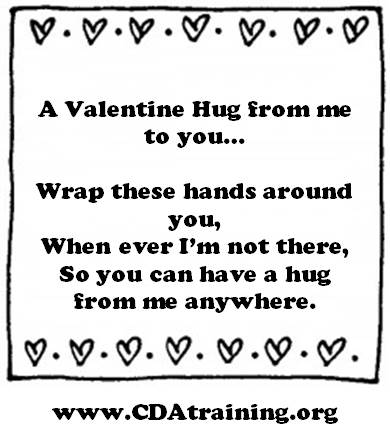
|
|


 RSS Feed
We have provided links where books or educational items that are related to the lesson plan can be purchased on Amazon. These links are intended for the purpose of your convenience to find the referenced item. However, as an Amazon Associate we earn from qualifying purchases that result from clicking on the links.
This website is owned and managed by Successful Solutions Professional Development LLC. Links to online courses that can be purchased are services that are provided by Successful Solutions Training in Child Development, which is a subsidiary of Successful Solutions Professional Development LLC.
This website is owned and managed by Successful Solutions Professional Development LLC. Links to online courses that can be purchased are services that are provided by Successful Solutions Training in Child Development, which is a subsidiary of Successful Solutions Professional Development LLC.
We offer the most comprehensive student support available in a web based learning environment.
E-mail: [email protected]
Phone: (360) 602-0960
Phone: (360) 602-0960
123 Play-and-Learn! Child Care Basics Resources
A child care curriculum blog brought to you by Successful Solutions Training in Child Development.
A child care curriculum blog brought to you by Successful Solutions Training in Child Development.
Address: PO Box 727, Burley, WA 98322-0727 * www.123playandlearn.com
Copyright 2018. Successful Solutions Professional Development LLC. * All Rights Reserved. Updated June 27, 2018
Copyright 2018. Successful Solutions Professional Development LLC. * All Rights Reserved. Updated June 27, 2018

Child Care Courses