|
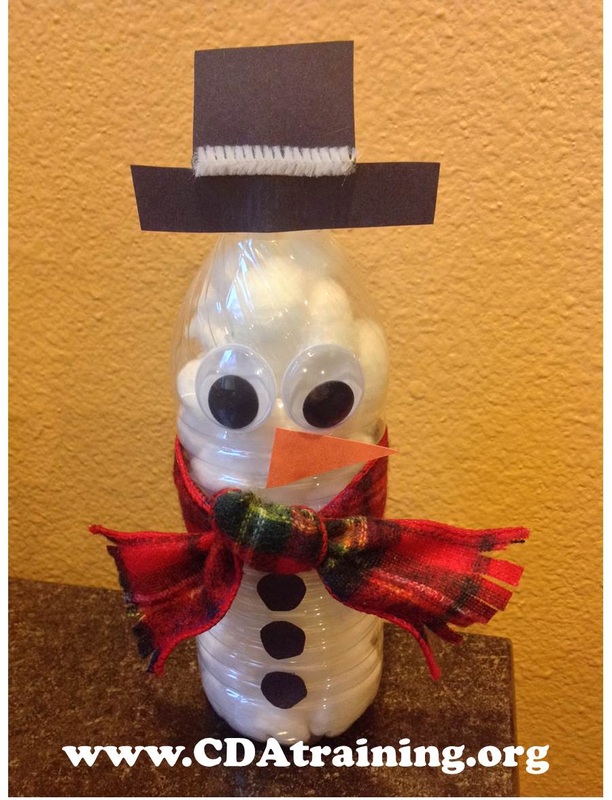
Supplies Needed; Empty water bottle, cotton balls, black construction paper, orange construction paper, wiggly eyes, and fabric or ribbon for scarf.
Directions; Fill water bottle with cotton balls. Using black construction paper, cut out a hat shape and three circles. Using orange construction paper, cut out a triangle for the nose. Glue on hat, buttons, eyes, and nose. Tie fabric/ribbon for scarf. We found a scrap of pipe cleaner and decided to use it as an accent for the hat.
0 Comments
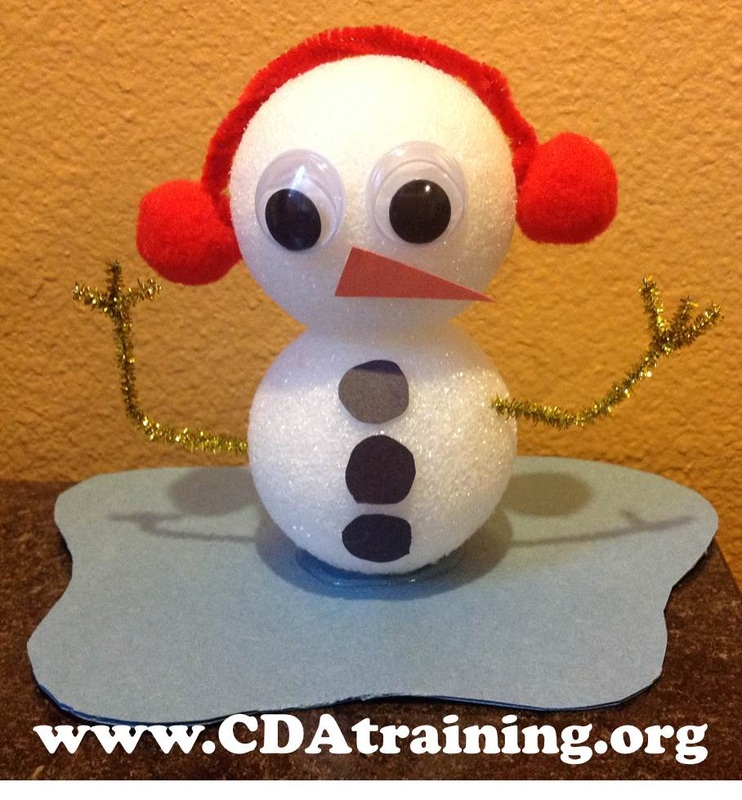
Supplies Needed; Styrofoam balls, wiggly eyes, orange, light blue and black construction paper, red and gold pipe cleaners, red pompoms.
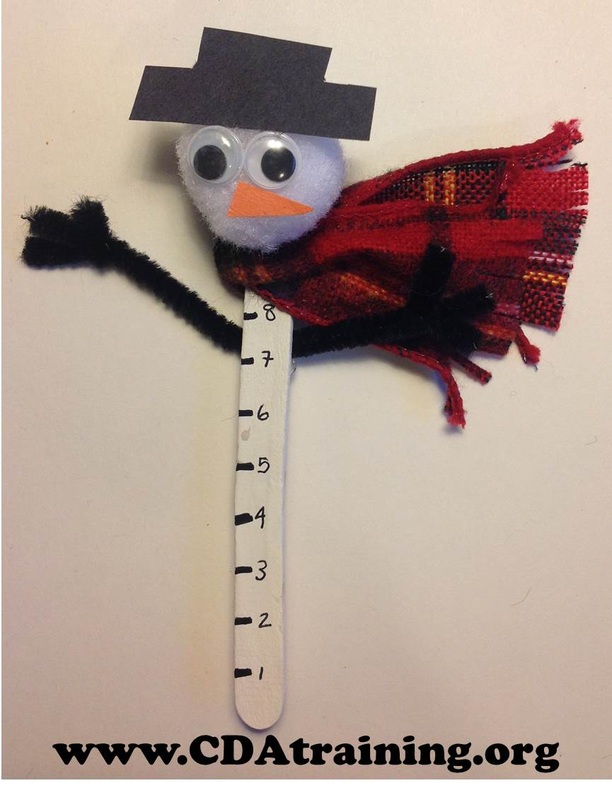
Directions; Glue Styrofoam balls together and allow to dry. While they are drying twist pipe cleaners into desired arms, use black construction paper to cut out three small circles, use blue construction paper to cut out a puddle shape, and use the orange paper to cut a triangle for the nose. Now glue the Styrofoam balls to the blue paper so that the snowman appears to be standing in the middle of the puddle, and allow to dry. Once dry, insert arms into base of snowman, and glue on all the other pieces. For the Earmuffs, fold red pipe cleaner in half, and twist together, then bend into an arch shape. Glue the red pompoms to either end and place on snowman's head. Supplies Needed; Popsicle stick, white paint, pompom, wiggly eyes, black pipe cleaners, fabric or ribbon (for scarf), black pen, glue, and black construction paper.
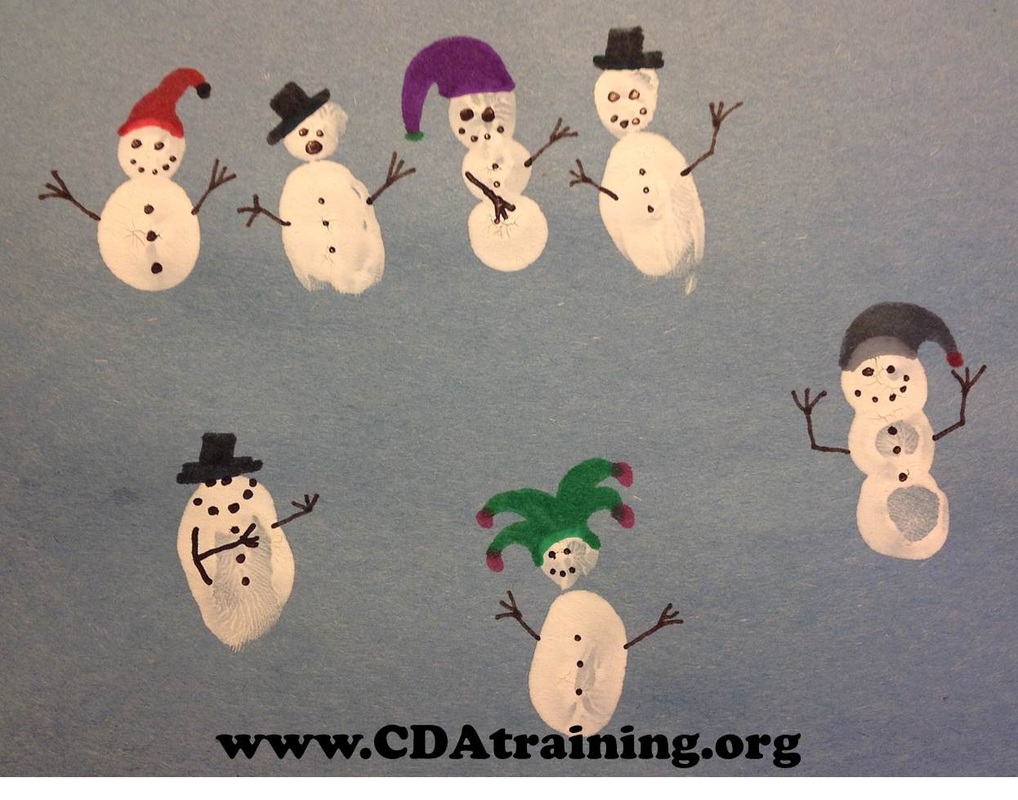
Directions; Paint popsicle stick white and allow to dry. Use black construction paper to ct out a hat, and orange to cut a triangle for the nose. Glue wiggly eyes, hat, and nose to white pompom. Glue snowman head to (dry) popsicle stick. Cut ribbon or fabric into a scarf. Glue scarf to popsicle stick. Next, twist black pipecleaners into desired arm shape, and glue to back of popsicle stick. Finally, use a ruler and black pen to draw on desired measurements. Place outdoors to measure snow. Supplies needed; White paint, blue construction paper, and colored markers.
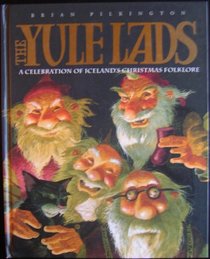
Directions; Make a series of white fingerprints. You can use one print, two, or three. Allow to dry. Once dry decorate as seen in photo above, or add your own flair. Winter Solstice is also called by Yule. It is the longest day of the year, and generally happens on or around December 21st. Let’s make a Yule log filled with goodies. Read: “The Yule Lads: A Celebration of Iceland’s Christmas Folklore” by Brian Pilkington. These mischievous lads steal milk, and play tricks on the townsfolk. Materials needed: Paper towel roll, tissue paper, ribbons, pine cones, leaves, glue, goodies to fill the paper towel roll.
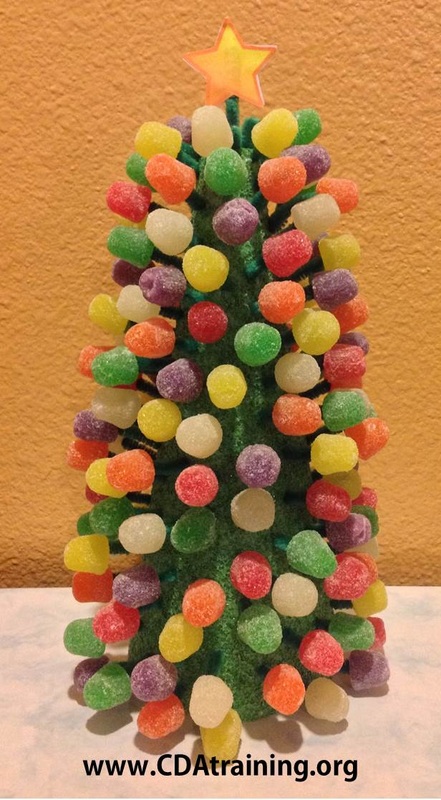
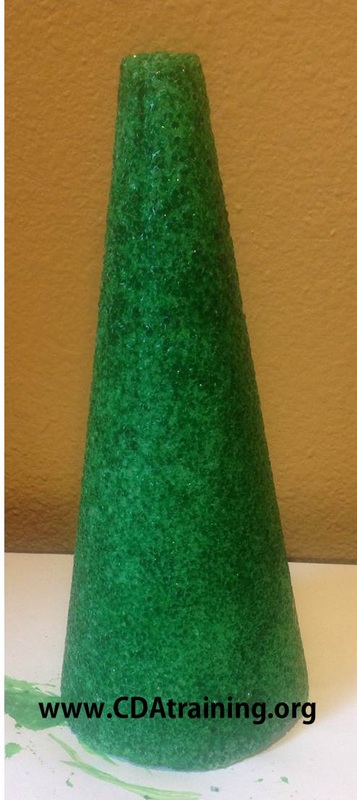
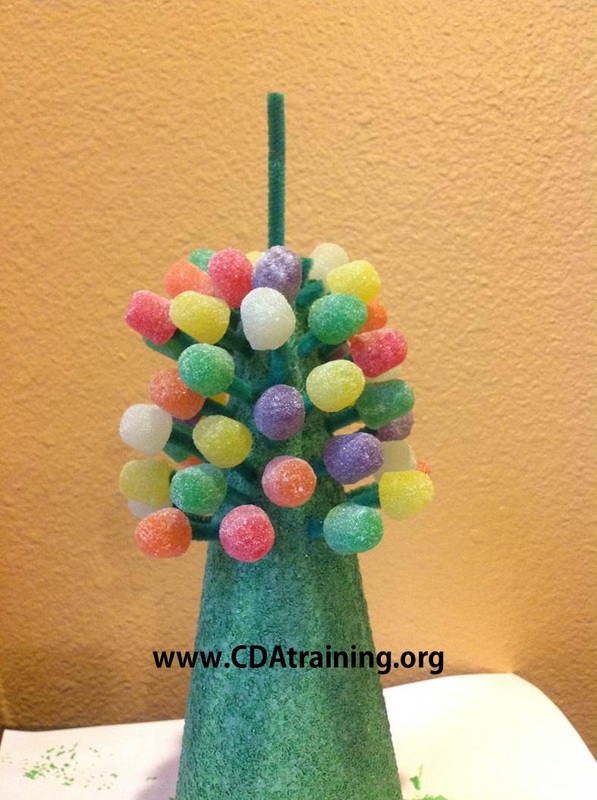
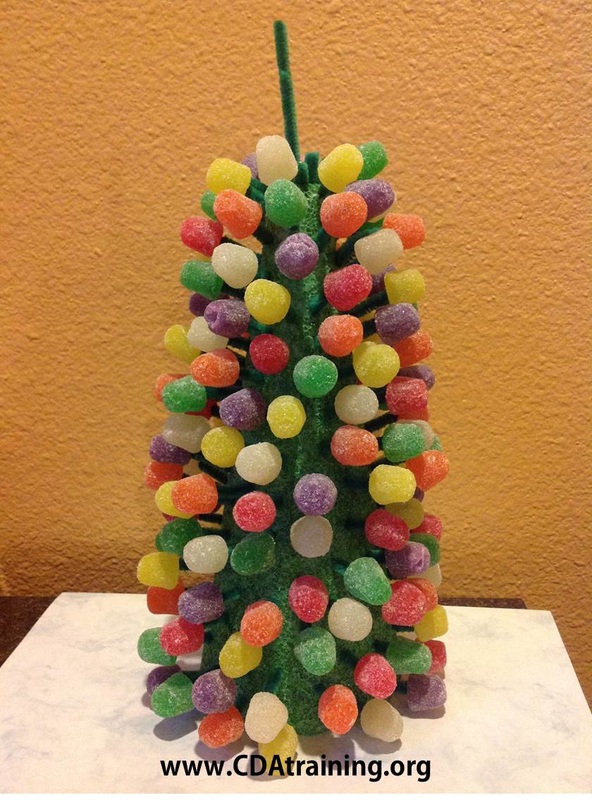
Directions: Let the children put glue on the outside of the paper towel roll. Give them precut pieces of tissue paper long enough to cover the roll and twist at the ends to keep the goodies inside. Twist one end, and fill the inside with treats. Twist the other end. Let the children decorate the top of the yule log with natural things like pinecones and leaves. Ribbons add a nice touch. Supplies Needed; 1 (8-in.) Green Cone-Shaped Styrofoam Form, 1 Package of Green Chenille Stems (Pipe cleaners), Wire Cutters or Utility Scissors, Dark Green Temper Paint, 1 Package Gum Drops
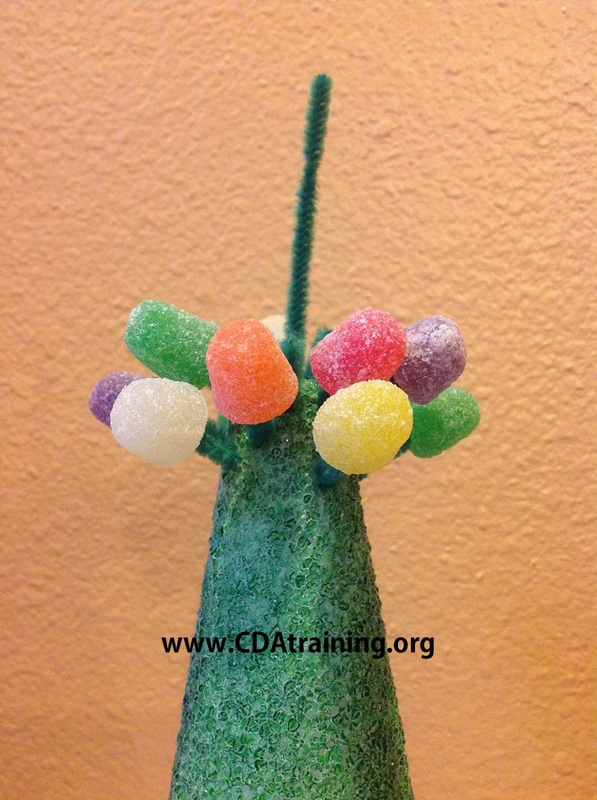
Directions; Begin by painting your styrofoam cone dark green. Cut chenille stems in a variety of lengths. Insert the shorter stem pieces in the top of the form, and increase the stem lengths as you work down toward the base of the cone creating the christmas tree shape. As you work your way down, push different colored gum drops into the chenille stems. Cover the form with the chenille stems and gum drops. You can bend them in any direction you desire since no Christmas tree is perfect. When you are finished, print and cut out the star shape (see below). Place a 3" stem into the top of the tree. Glue the star (sandwich style) to the top stem. |
WinterArchives
January 2014
Categories
All
|
- Blog
- Online Child Care Courses
-
Seasonal Themes
-
Spring Themes
>
- Air and Space
- Arbor Day
- Birds
- Bunnies
- Cinco De Mayo
- Easter
- Eggs
- Farm
- Father's Day
- Fishing
- Flags of the World
- Flowers and Gardening
- Foster Care Awareness Resources
- Found Art
- Hot Air Balloon
- International Children's Book Day
- Insects
- Kid Friendly April Fools Pranks
- Mother's Day
- National Bed Month
- Rainbows
- Saint Patrick's Day
- Spring
- Sports
- Weather
- Women's History Month
- Worms
- Fall Themes >
- Summer Themes >
-
Winter Themes
>
- Advent
- Black History Month
- Cardiac Health
- Christmas >
- Chinese New Year
- Congenital Heart Defect Awareness Month
- Dental Heath Awareness
- Dr. Martin Luther King Jr. Day
- Dr. Seuss Birthday
- Elf on the Shelf Ideas
- Football - Super Bowl
- Germs and Illness
- Grinch
- Groundhog Day
- Hanukkah
- Hibernation
- Kwanzaa
- National Cookie Day
- New Years
- Olympic Games
- Penguin
- Pets
- Post Office
- Presidents Day
- Sensory
- Snow
- Snowman
- Teddy Bears
- Winter
- Valentines Day
- Valentines Day Cards
- Valentines Day Decorations
-
Spring Themes
>
- All About Babies
- Growing and Learning
- Contact Us
- Online Courses for Early Childhood Educators
We have provided links where books or educational items that are related to the lesson plan can be purchased on Amazon. These links are intended for the purpose of your convenience to find the referenced item. However, as an Amazon Associate we earn from qualifying purchases that result from clicking on the links.
This website is owned and managed by Successful Solutions Professional Development LLC. Links to online courses that can be purchased are services that are provided by Successful Solutions Training in Child Development, which is a subsidiary of Successful Solutions Professional Development LLC.
This website is owned and managed by Successful Solutions Professional Development LLC. Links to online courses that can be purchased are services that are provided by Successful Solutions Training in Child Development, which is a subsidiary of Successful Solutions Professional Development LLC.
We offer the most comprehensive student support available in a web based learning environment.
E-mail: [email protected]
Phone: (360) 602-0960
Phone: (360) 602-0960
123 Play-and-Learn! Child Care Basics Resources
A child care curriculum blog brought to you by Successful Solutions Training in Child Development.
A child care curriculum blog brought to you by Successful Solutions Training in Child Development.
Address: PO Box 727, Burley, WA 98322-0727 * www.123playandlearn.com
Copyright 2018. Successful Solutions Professional Development LLC. * All Rights Reserved. Updated June 27, 2018
Copyright 2018. Successful Solutions Professional Development LLC. * All Rights Reserved. Updated June 27, 2018

 RSS Feed
