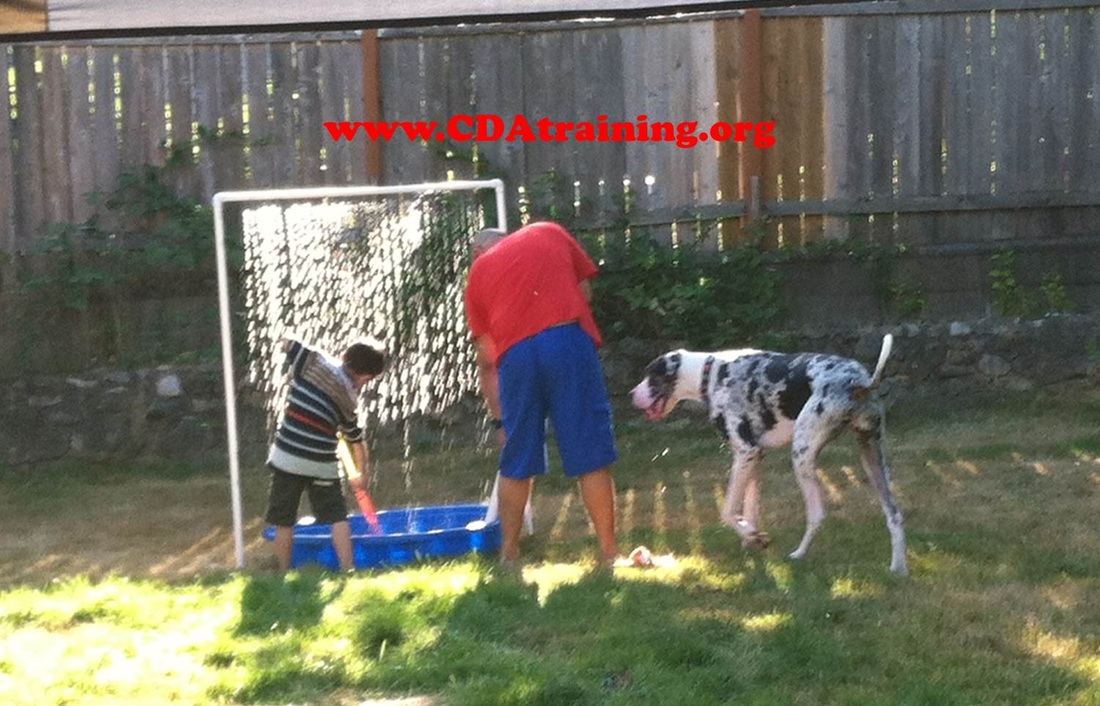
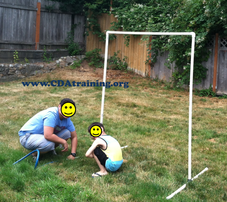
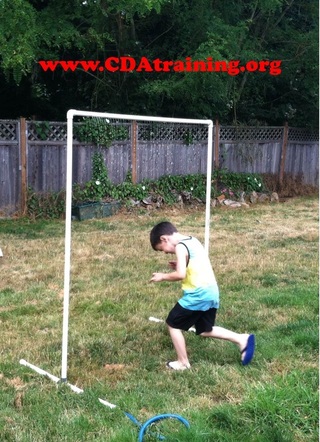
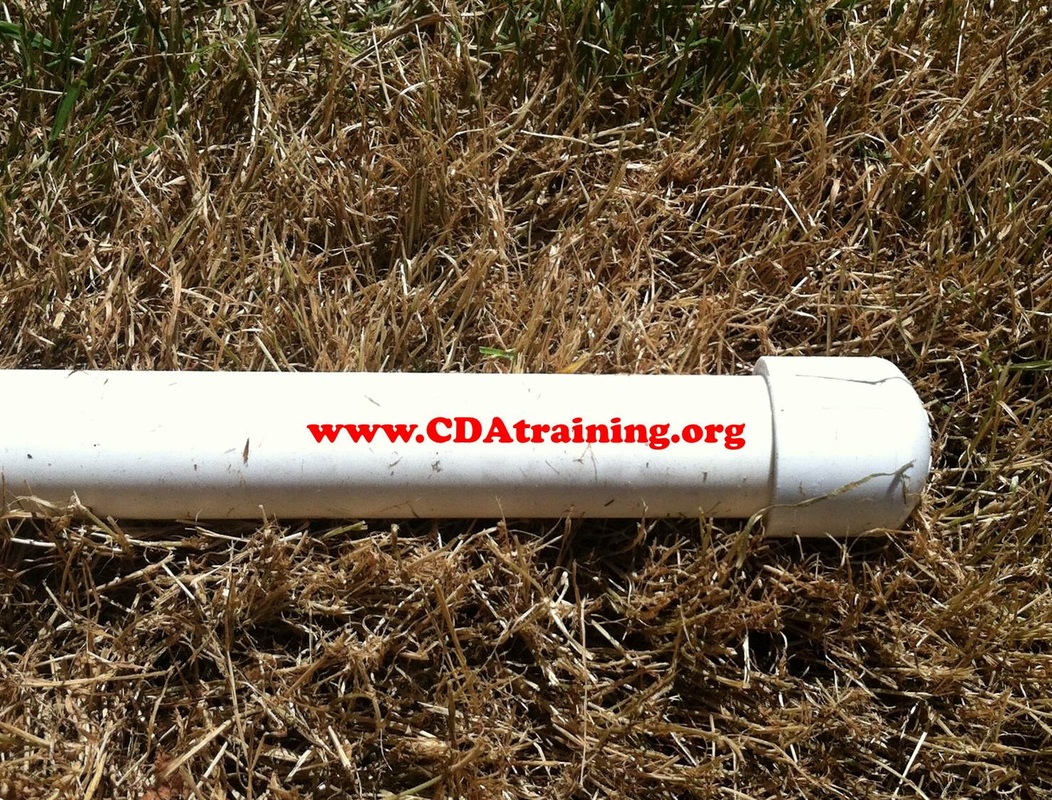
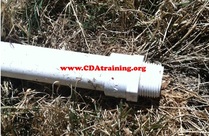
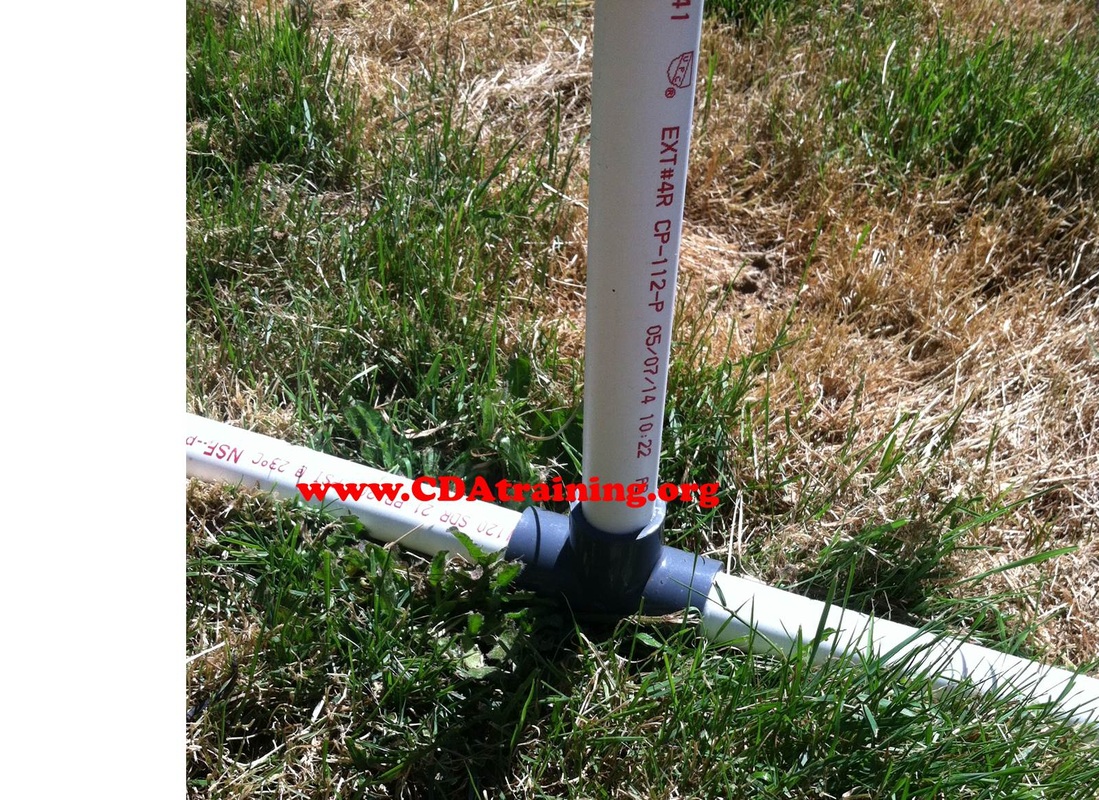
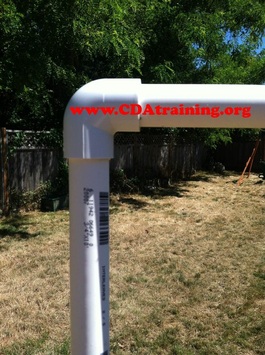
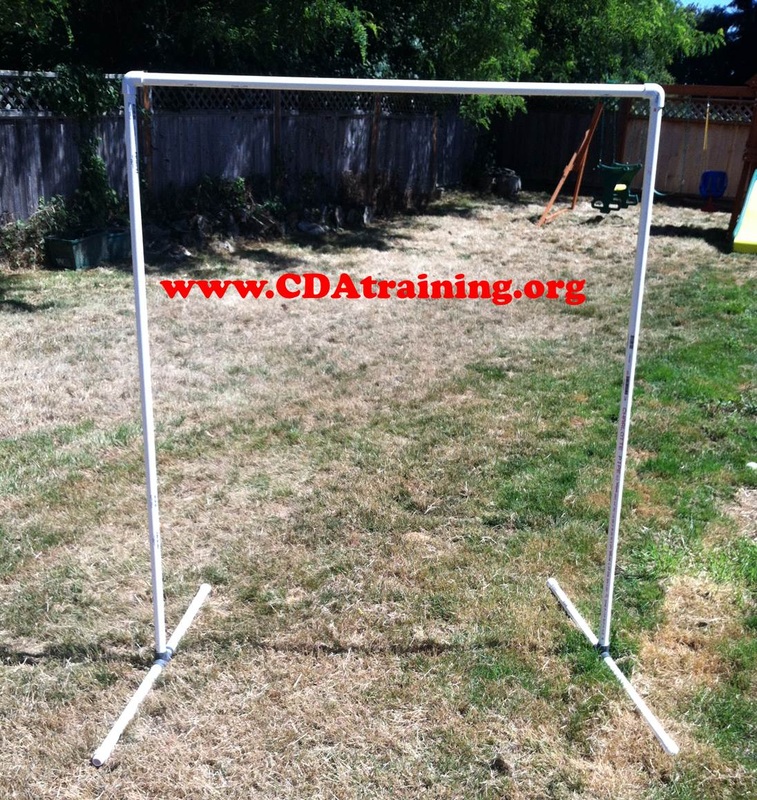
Head to your local hardware store for the following 3/4" pipe and fittings: 2 ten foot lengths of PVC 3 end caps 1 threaded female hose connector (slip fit) 2 elbow joints (90 degree) 2 T connections Time to cut. You will need the following sections and sizes: 2 at 5 feet 1 at 4 feet 4 at 18 inches Cut one of the 10' lengths in half so that you have two 5' sections. Then, cut a 4' section from the second one. Cut the remaining 6' section in half and then each of the 3' sections in half. Time to Drill. We want all the sprinkler holes pointing more or less in the same direction, so start out by making a center line on the three longest pieces of pipe. Hold two pieces of pipe next to one another and use one as a guide to mark the other. The angle you hold your pen/pencil at isn't important, just keep it the same and you'll end up with a straight line. I found that a 5/32" drill bit was perfect for the holes we wanted. Make sure there are no PVC chips or other debris in the pipes before assembly. Fit the drilled pipes together to form a "U" shape with all the drilled holes facing inward. Once you're satisfied glue up the "U", making sure the holes stay facing inward. Time to Assemble. Now that the "U" is glued, we need a base to stand it up on. Assemble the "U" and the base without glue. Make sure the base pieces are parallel with each other, and perpendicular to the plane of the "U". You can place the base pieces on either edge of a sidewalk for a handy reference before gluing it up. Line the "T" pieces up with each side of a crack, then make the base pieces parallel to the edges of the sidewalk and you're ready for the final glue. Once the glue is dry, you can attach your hose and try it out.
0 Comments
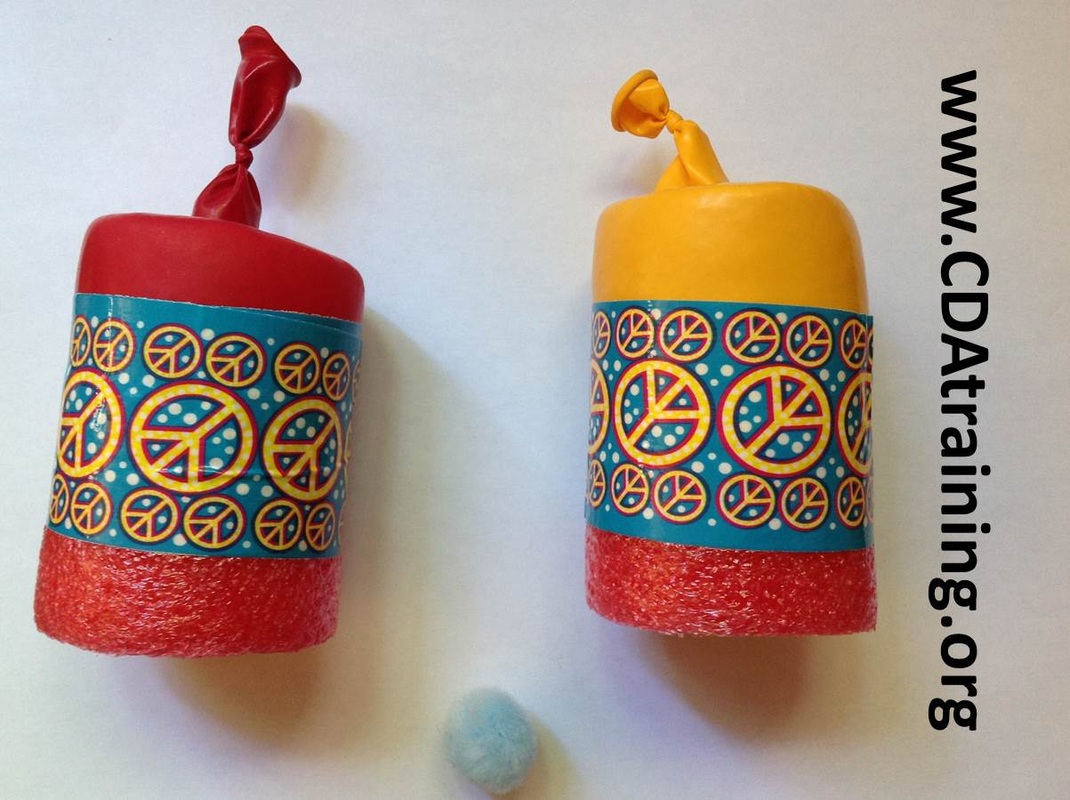
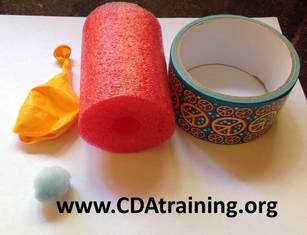
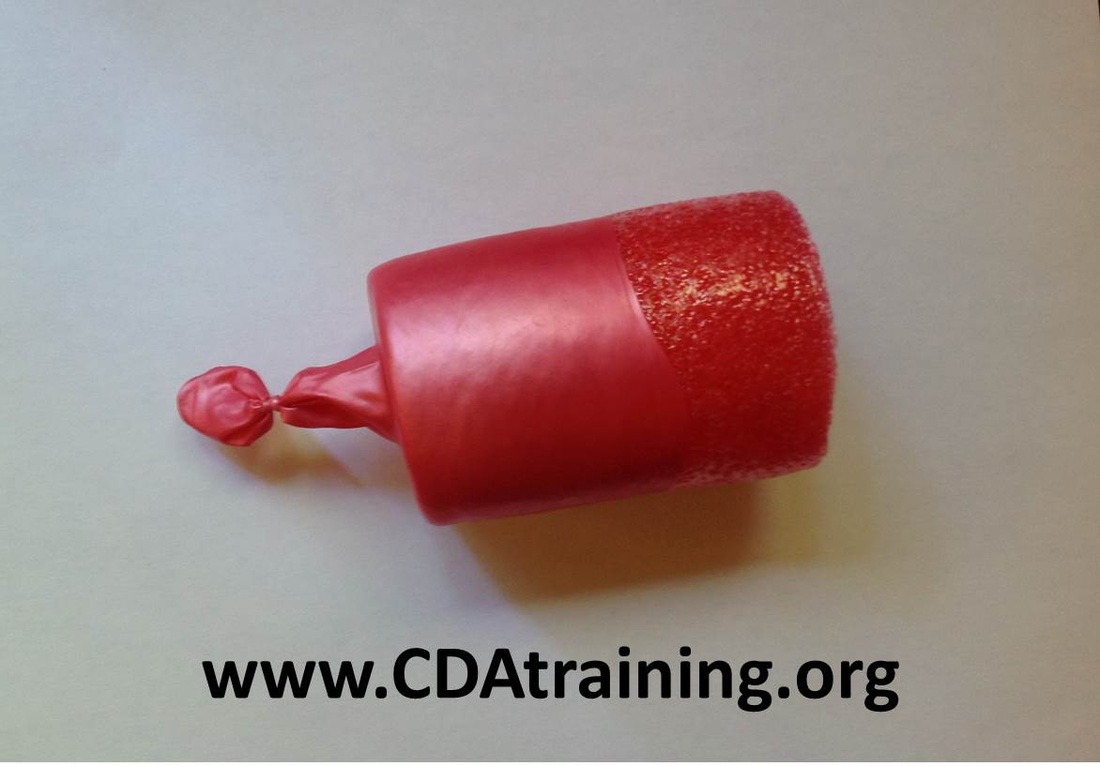
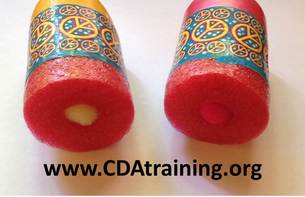
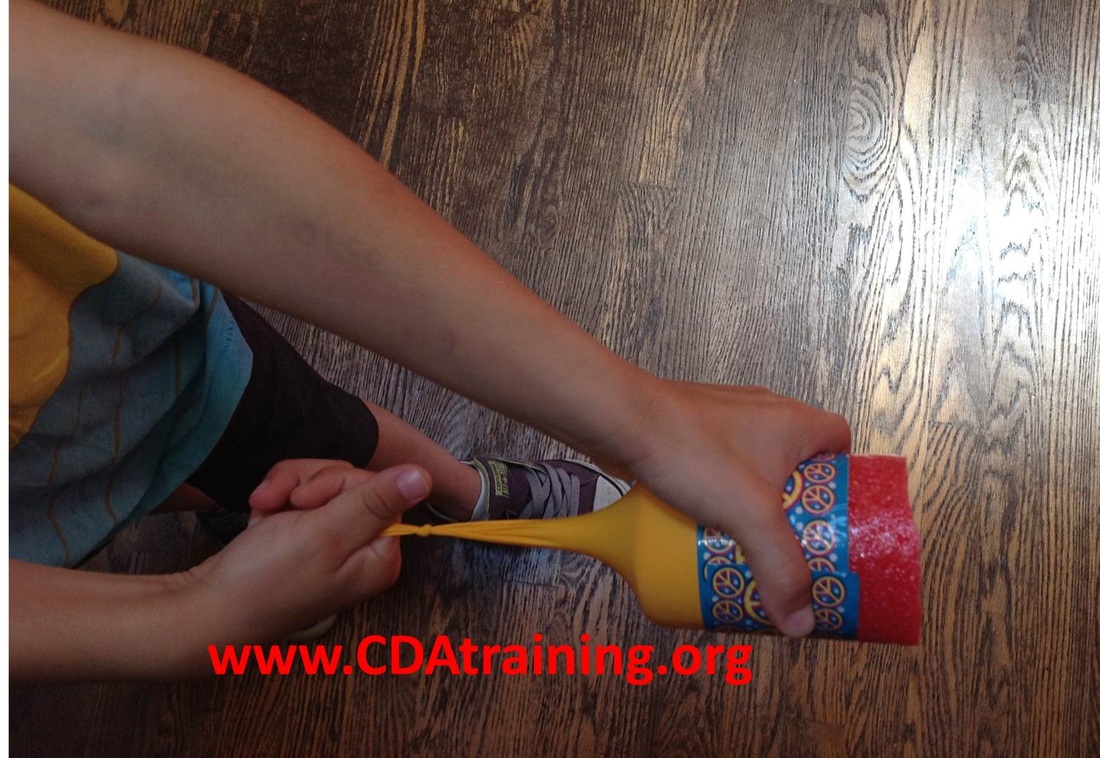 Supplies Needed; Large balloons, pool noodle, duct tape, and pompoms Directions; *Adults Only* Cut a 2-3" section of pool noodle. We used a steak knife to cut ours. Tie the end of your (deflated) balloon in a knot. Cut off a small piece of the top of the balloon. Take your balloon and stretch it over the end of the pool noodle. Then seal the edge of the balloon with a round of your duct tape. See the photos below for a better idea of how to assemble the poppers.
 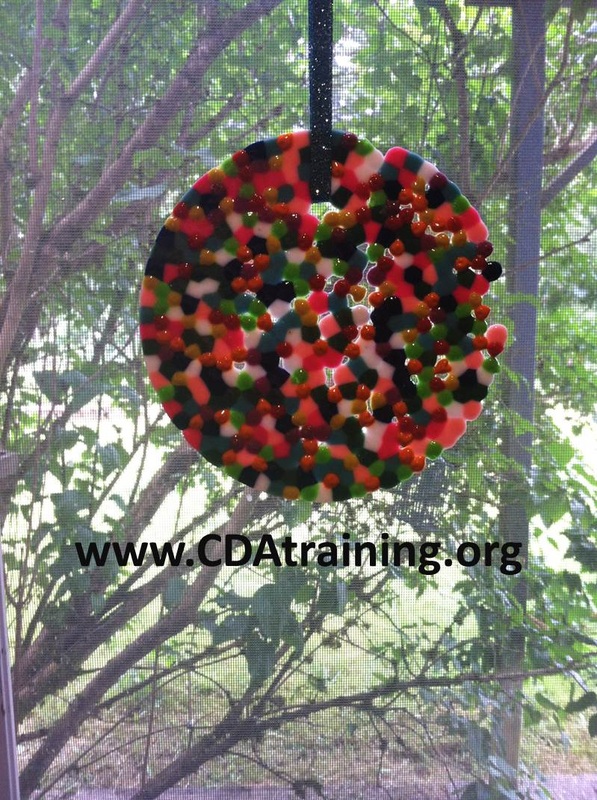
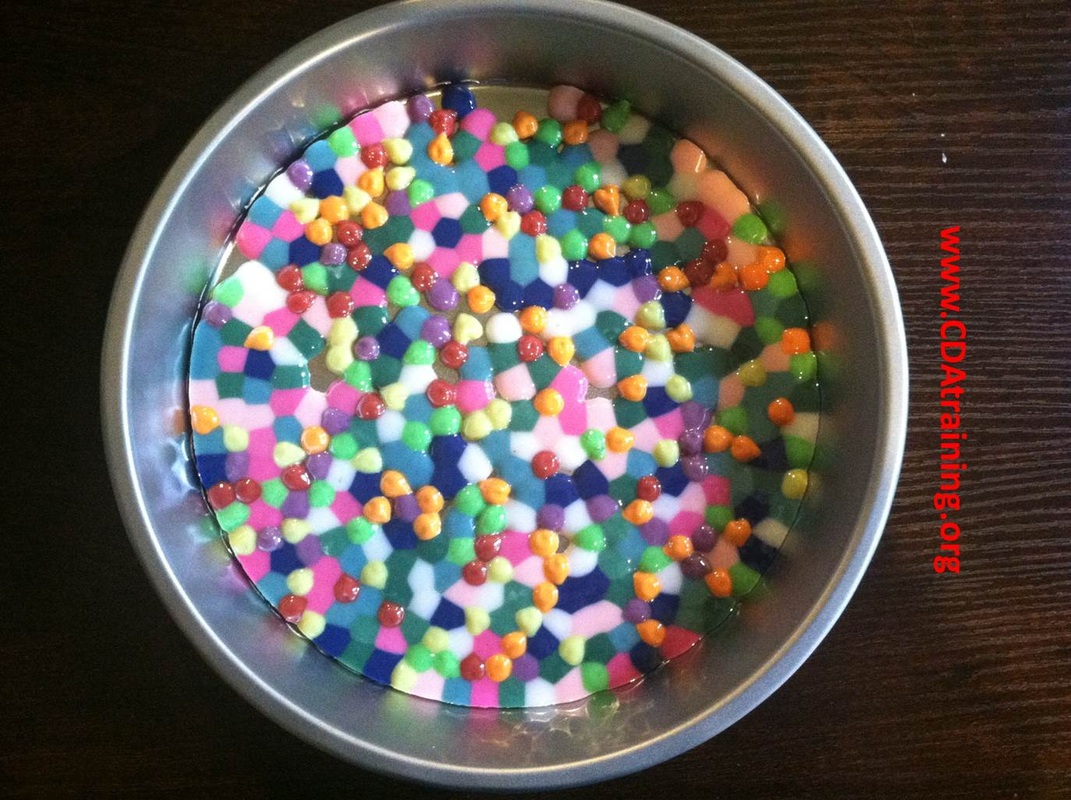
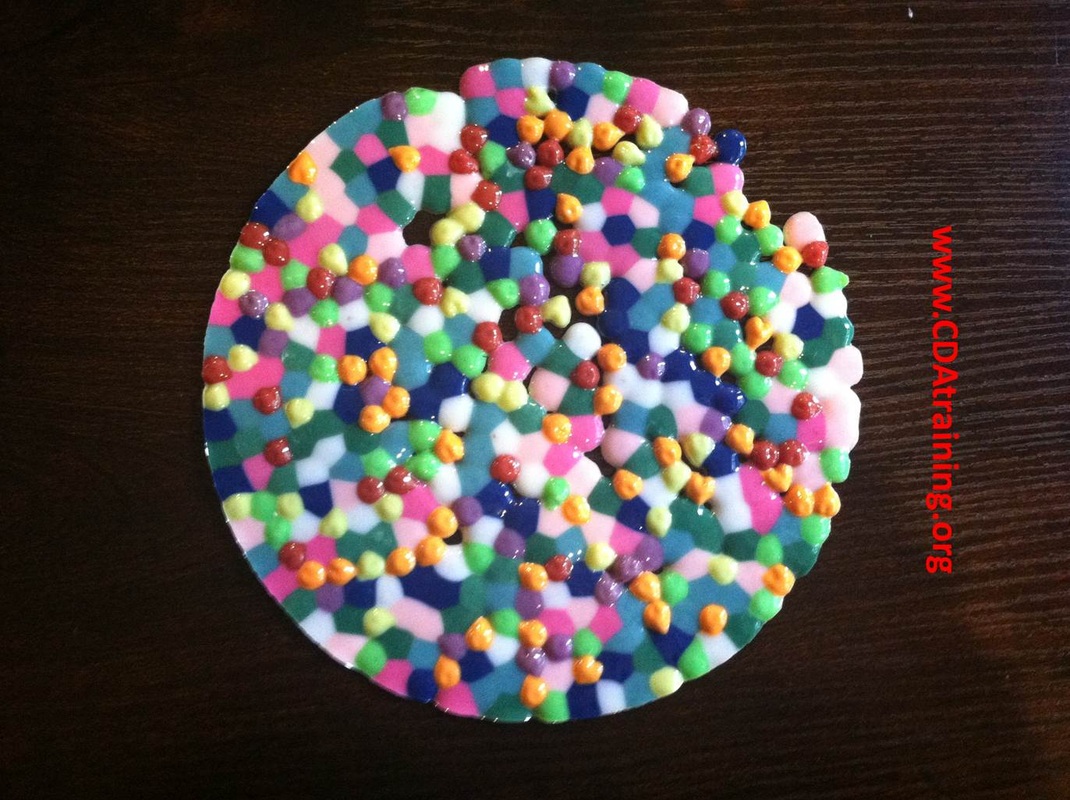
Supplies Needed; Cheap plastic beads, pie tin (or cupcake tin) and ribbon to hang Directions; Place your beads, with the holes facing up, in the pie tin (or cupcake tin). You do not need to grease or prep the pan. Preheat the oven to 400 degrees. Place pan in oven for 20 minutes, or until all beads are melted. When melted, remove pan from oven, and allow to cool. Once cool, remove your sun catcher from the pan, add a ribbon to hang, and display as desired.
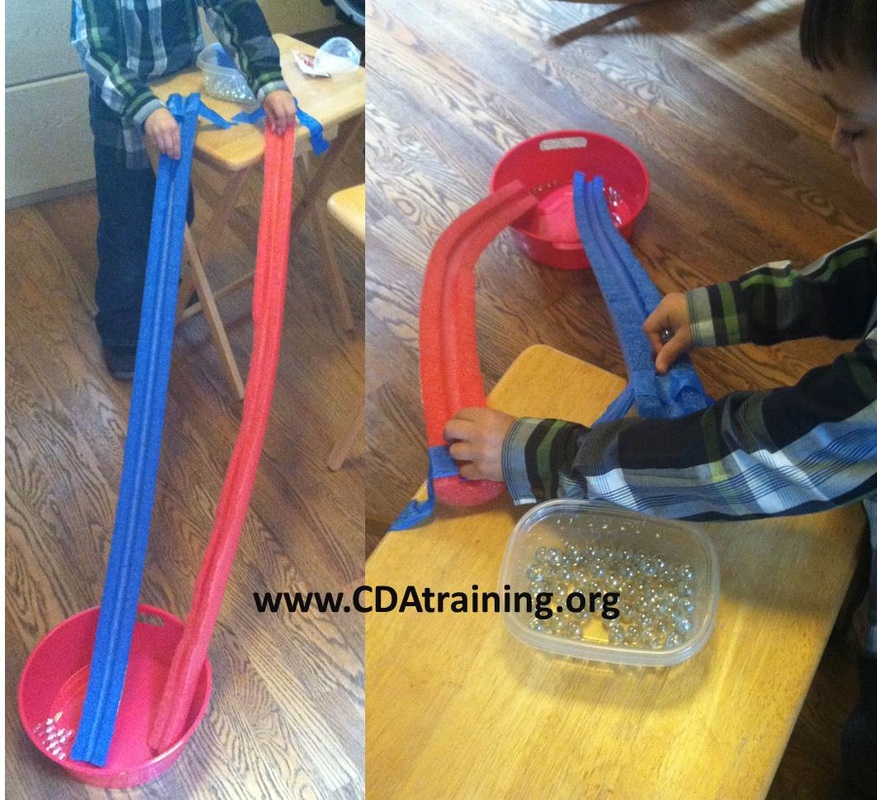
Pool noodles seem to overly abundant, and cheap, this time of year. We decided to pick up a couple at the local dollar store and create marble chutes. We cut them in half using a steak knife. The cutting was very easy to do, and barely made a mess. We then used a tv tray, some painters tape, and a bucket to catch the marbles at the bottom.
As the project became more elaborate we incorporated toilet paper rolls and match box cars.
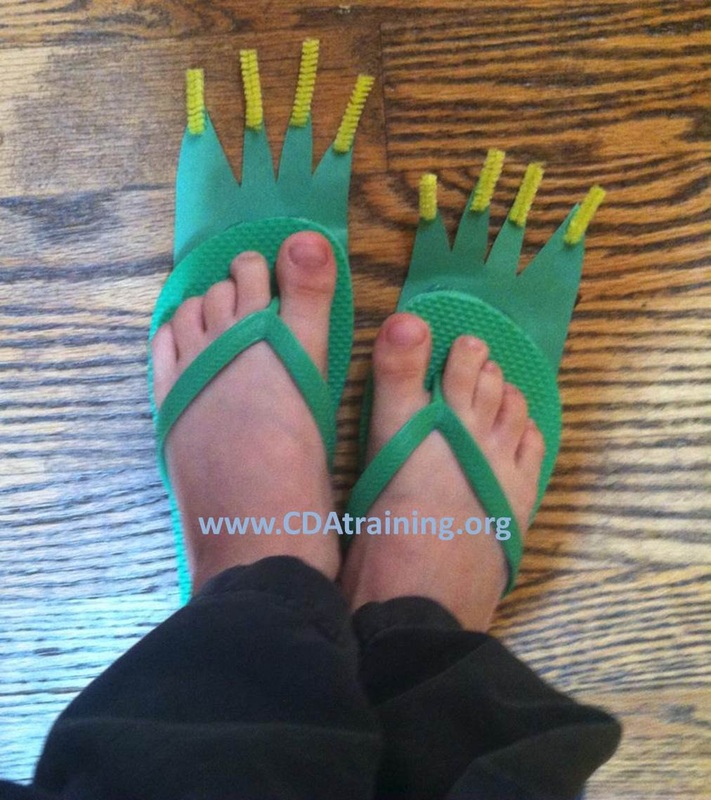
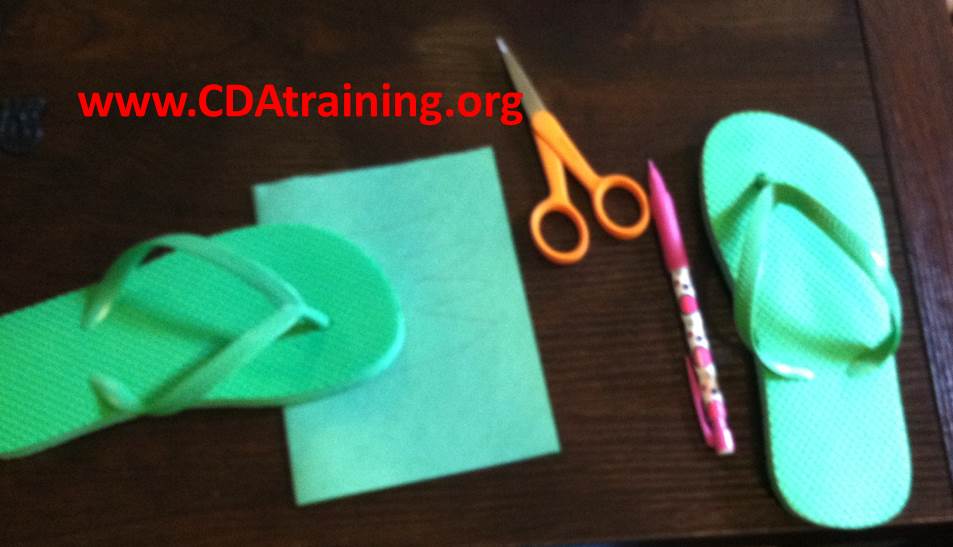
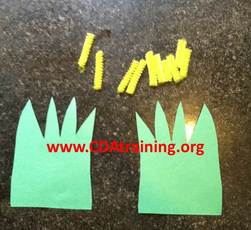
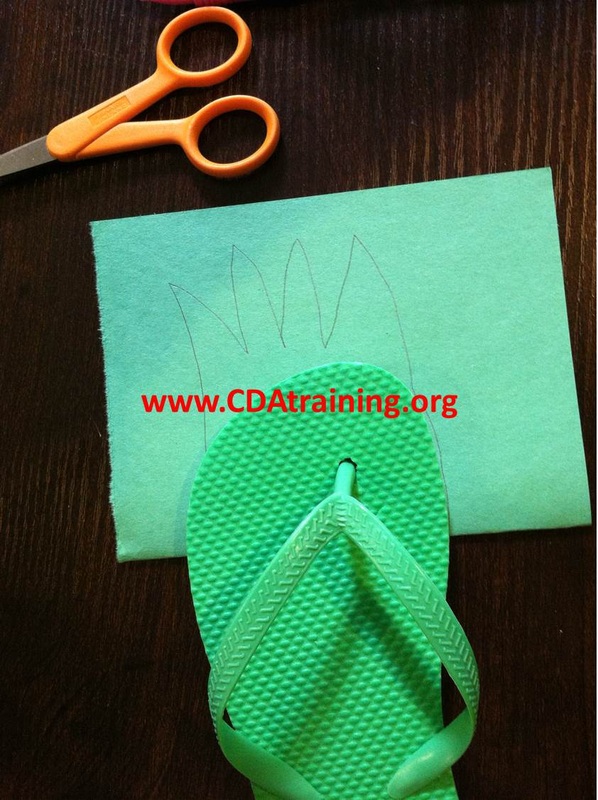
Supplies Needed; Foam or construction paper, green flip flops, scissors, glue gun, pencil, and a yellow pipe cleaner. Directions; Use the toe of your flip flop to "free hand" the shape of your dinosaur toes. Cut out the shape. Cut your pipe cleaner into pieces about 1/2 long. Glue the pipe cleaner pieces to the tips of your dinosaur toes. Glue the shape to the bottom of your flip flop, and allow to dry.
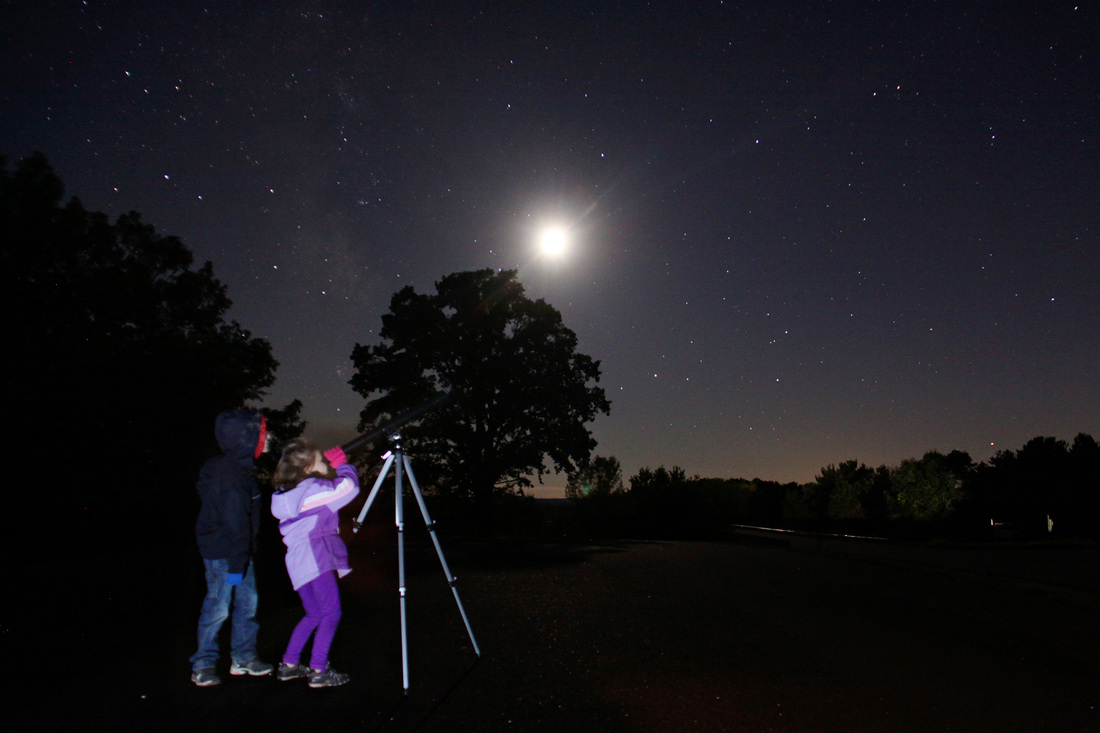
Paint your night sky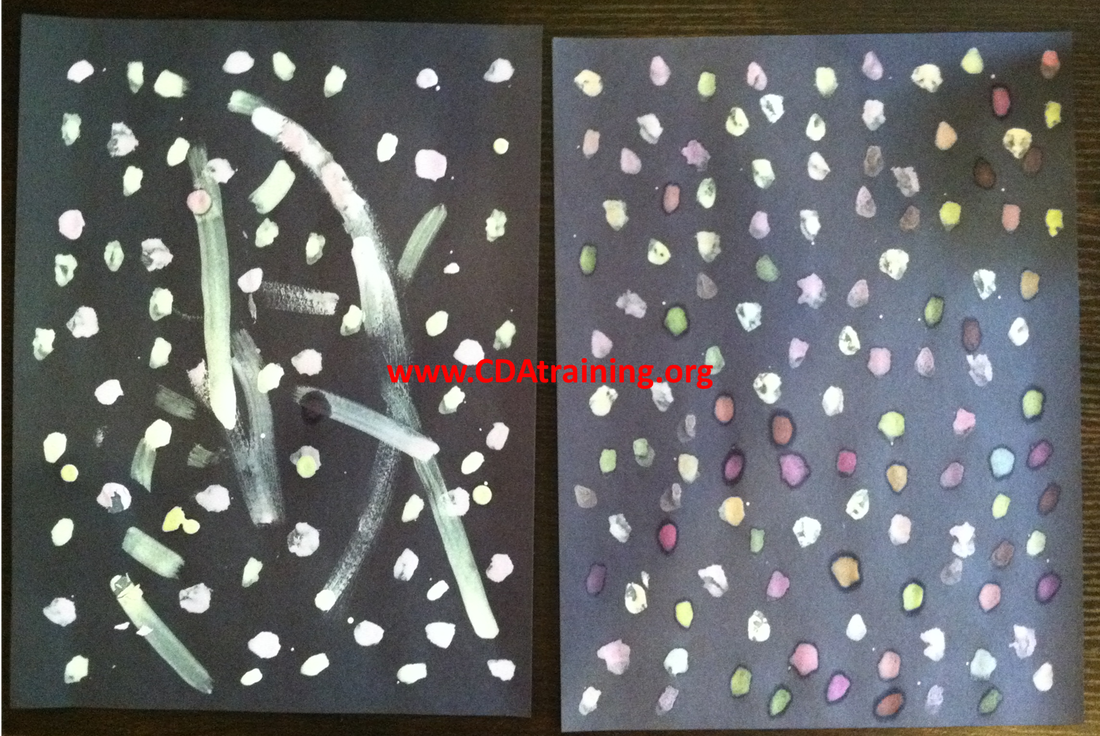
STAR PAINT Supplies: 1 part cornstarch (1 c.) 1 part water (1 c.) food coloring (we used neon colors) Mix corn starch and water. Add food coloring and mix. *I used a muffin tin for extra large muffins to hold the paint. One cup of cornstarch and one cup of water filled them about half way. The paint stretched further than I thought. 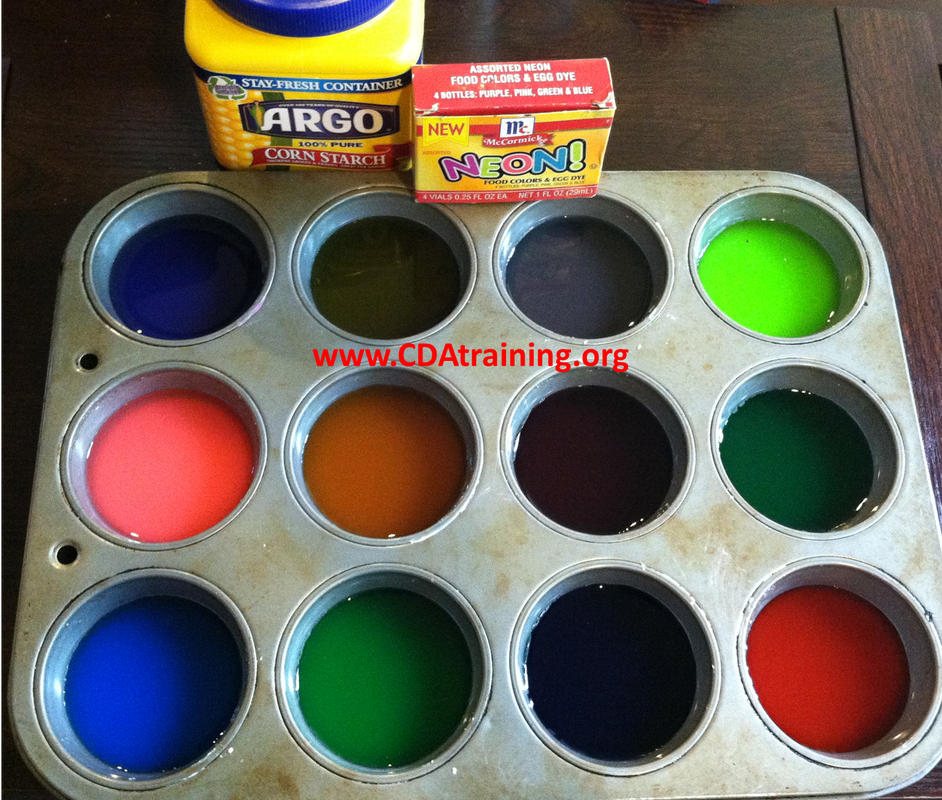
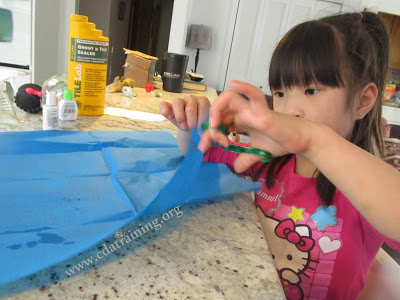
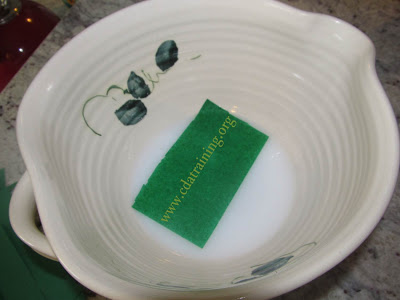
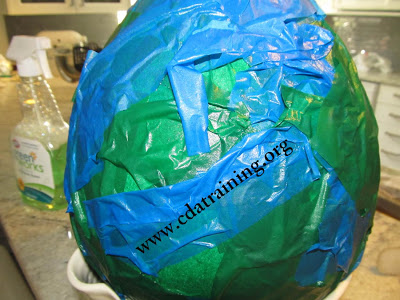
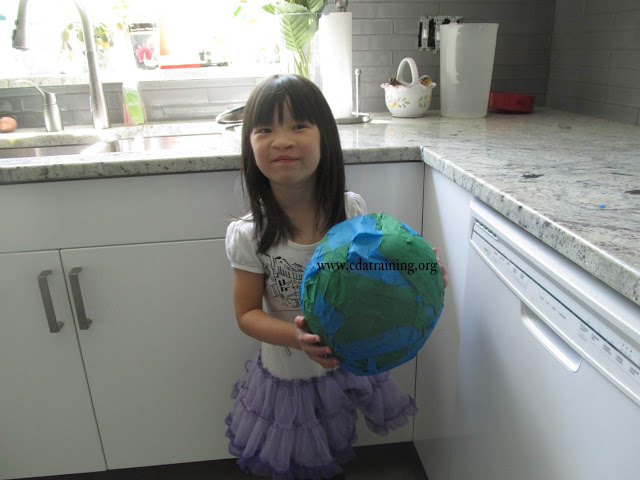
Here is what you need: 4 Sheets of tissue paper, glue, water, balloon, and scissors. 1. Blow up the balloon 2. Cut tissue paper into approx 4x4 squares. 3. Mix 1/3 cup glue with 1 cup of water and place into a bowl. 4. Place the tissue papers (one at a time) into the glue mixture and let it get soaked through. 5. Place all over the balloon. Do 3 layers of tissue paper. 6. Leave a space at the bottom of the balloon where the tie is. 7. Let dry. This may take a day or two. 8. When totally dry, pop the balloon and remove. Now you have a paper mache globe! 
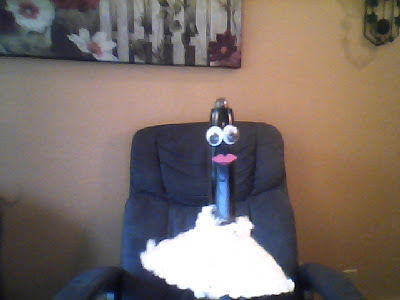
Sometimes things don't go as planned, and that's not always a bad thing. According to "The Kitchen Project", the potato chip was invented when a cook, George Crum, got angry at a customer who kept sending back "soggy and thick" French fries. He fried up some thin crunchy fries, creating potato chips. The customer loved them. All of America loves them. Crum's little burst of anger led to a great invention. Now you might be wondering what this has to do with the face on my pen. The last couple days my main plan for the blog post has failed miserably. I have been trying to create a weaving project to promote fine motor skills along with a little culture lesson. One little problem; I am really horrible at weaving. I am certain every child who tried to complete this project would have done 100,000 times better than me! So, as I tinkered with what was supposed to be a woven coaster, trying to make it lay flat and to make the hole in the center a little less conspicuous, I decided it looked like a skirt. On my pen it went, and I can’t have a little ballerina pen - without a face. Don't get discouraged when plans don't work out. You might have something fun planned for outside and the sun decides to turn into a storm. Let the children suggest indoor activities, or prompt them to create a game. Another activity you can do is look at abstract art, to see what the children think it is. This can also be done with classical music, asking the children to narrate a story that goes along with the music. You hear or see one thing, but someone else may see or hear a different story. Look at things differently and allow the children to lead. They might just teach you something. 
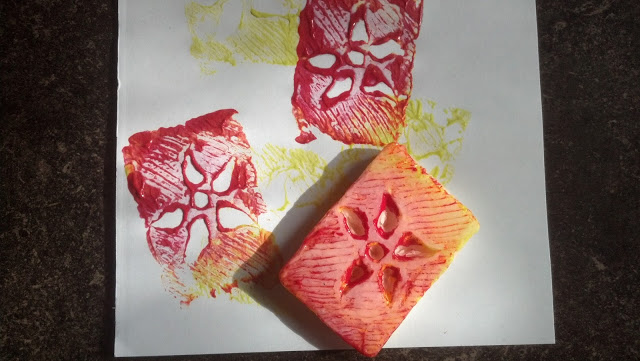
Working with children you find yourself saving a lot of recyclables such as water bottles, cardboard, and all sorts of packaging. Here is a new one for you to start collecting, cheese wax. Its the red stuff on the outside of the Babybel mini cheese rounds, as well as other various cheese, and comes in several colors. It is great for creating stamps and as play dough. The cheese wax can be melted or softened and molded. If you plan on melting it completely to pour into a container I would suggest using a double boiler. It not you can soften it in the microwave and shape it with your hands. We used to popsicle sticks to flatten the sides making our rectangle. After it has hardened use a toothpick, or a different child friendly device, to carve a design into the stamp. Then add a little paint or an ink pad and enjoy. 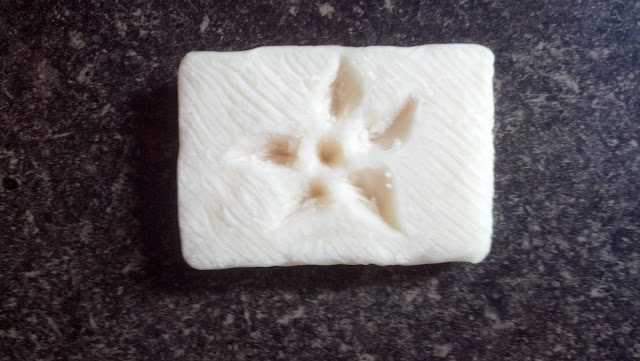
|

Summerwww.cdastars.com
Online Programs Archives
August 2014
Categories
All
|


 RSS Feed
We have provided links where books or educational items that are related to the lesson plan can be purchased on Amazon. These links are intended for the purpose of your convenience to find the referenced item. However, as an Amazon Associate we earn from qualifying purchases that result from clicking on the links.
This website is owned and managed by Successful Solutions Professional Development LLC. Links to online courses that can be purchased are services that are provided by Successful Solutions Training in Child Development, which is a subsidiary of Successful Solutions Professional Development LLC.
This website is owned and managed by Successful Solutions Professional Development LLC. Links to online courses that can be purchased are services that are provided by Successful Solutions Training in Child Development, which is a subsidiary of Successful Solutions Professional Development LLC.
We offer the most comprehensive student support available in a web based learning environment.
E-mail: [email protected]
Phone: (360) 602-0960
Phone: (360) 602-0960
123 Play-and-Learn! Child Care Basics Resources
A child care curriculum blog brought to you by Successful Solutions Training in Child Development.
A child care curriculum blog brought to you by Successful Solutions Training in Child Development.
Address: PO Box 727, Burley, WA 98322-0727 * www.123playandlearn.com
Copyright 2018. Successful Solutions Professional Development LLC. * All Rights Reserved. Updated June 27, 2018
Copyright 2018. Successful Solutions Professional Development LLC. * All Rights Reserved. Updated June 27, 2018

Child Care Courses