A Sensory Basket Idea that is Inexpensive and Fun
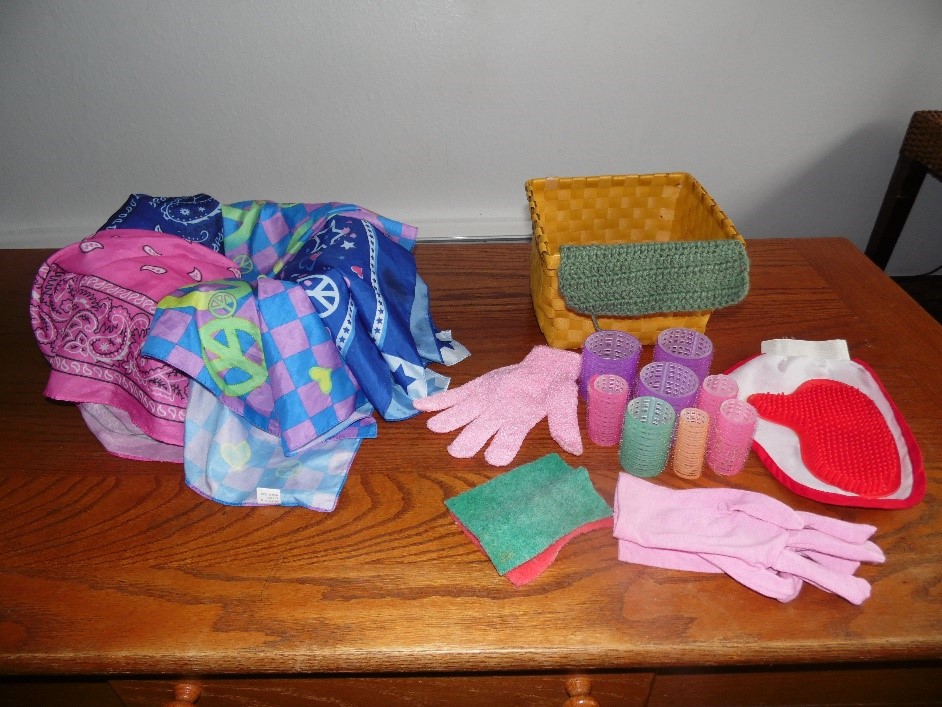
The point of these sensory activities is to allow children to explore different textures of items that may be found in the home or closet. These items are easily used with other materials in the room scaffolding the sensory experience. Here are a few ideas for two sensory baskets that children really enjoy. Everything came from the discount store or were gifts that we received but never used. They are items we might not think of first when putting together a sensory container and are easy to store and pull out at a moment’s notice. Basket One
Several nylon scarves ($3.00), basket (.50) Basket Two A hand made crocheted square (free), self-hold curlers (1.00) , a dog grooming mitten ($1.00), dish scrubbing pads ($1.00) , shower gloves (free), cotton gloves usually used to wear at night to soften hands (free), basket (.50).
0 Comments
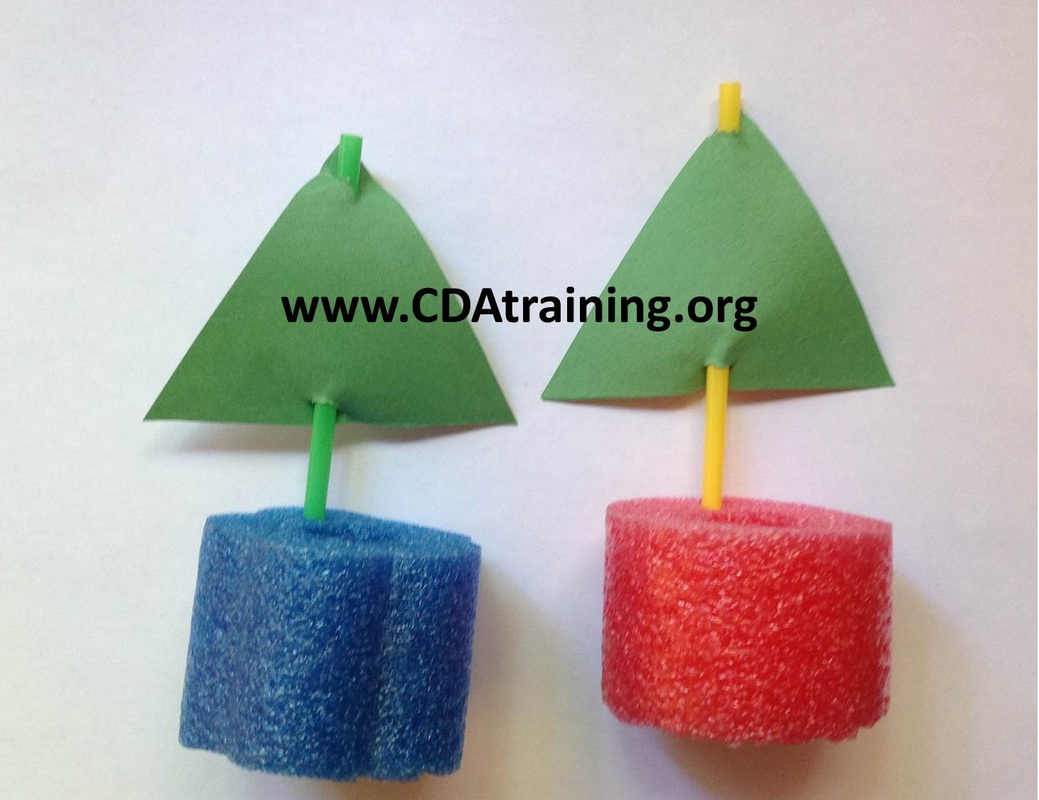
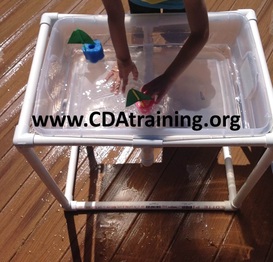
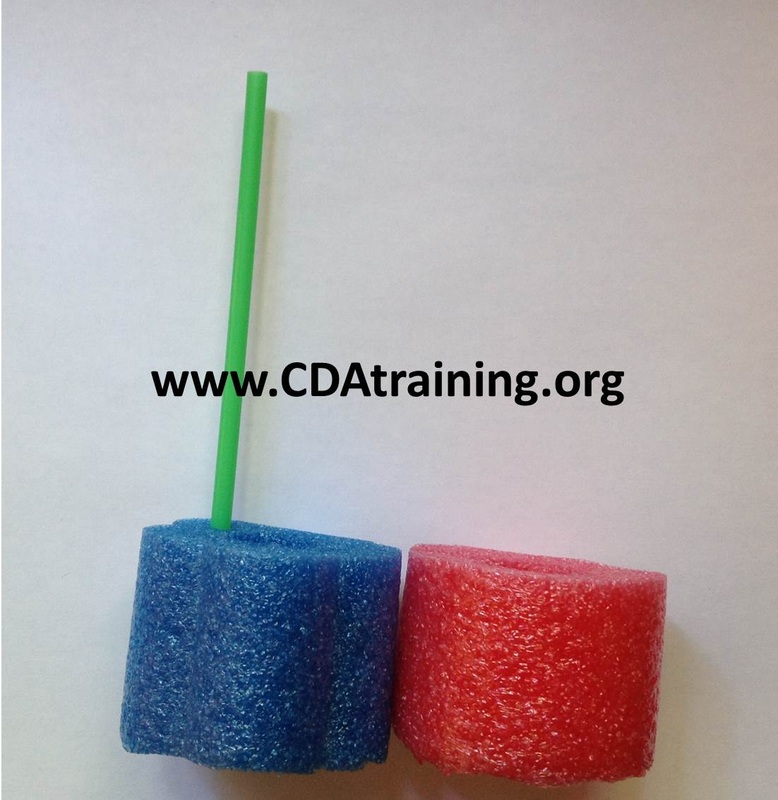
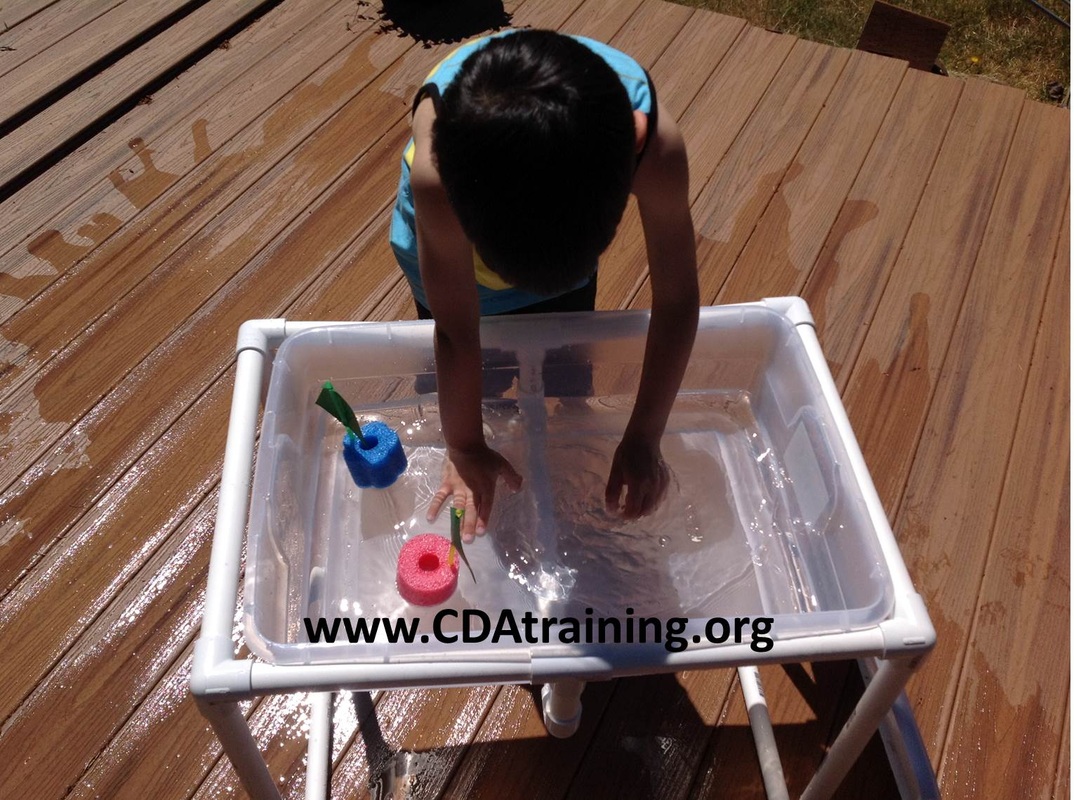
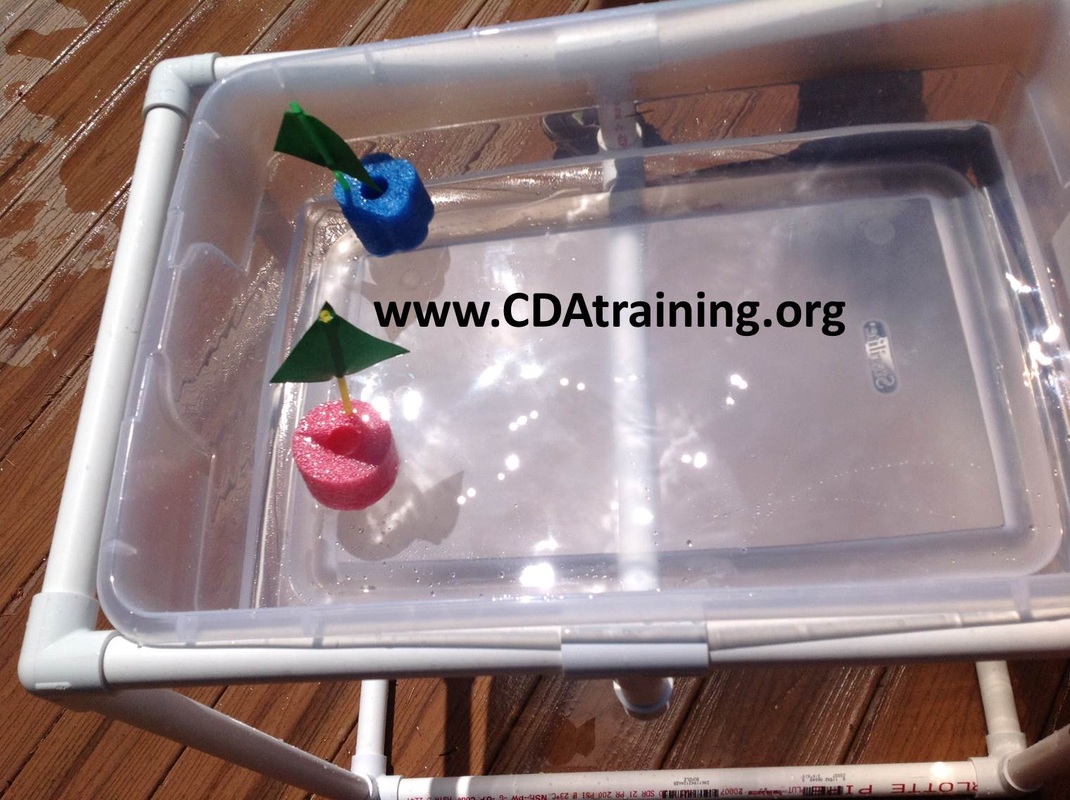
Supplies Needed; Pool Noodle, drinking straw, construction paper, and scissors. Directions; *Adults Only* Cut a 2-3" section of pool noodle. We used a steak knife to cut ours. Use your scissors to poke a hole in the top edge of your pool noodle section, then insert your straw. Next, take your construction paper, and cut a triangle to the size you would like your sail to be. Puncture a hole in your sail towards the top of the triangle point, and in the middle of the longest side. Thread your straw through the holes and cut straw to size. We used our boats in our Sensory table that we made for less than $20. You can see the directions to make the table by clicking here.
This is by far the easiest and most cost effective way (for adults) to make a sensory table.
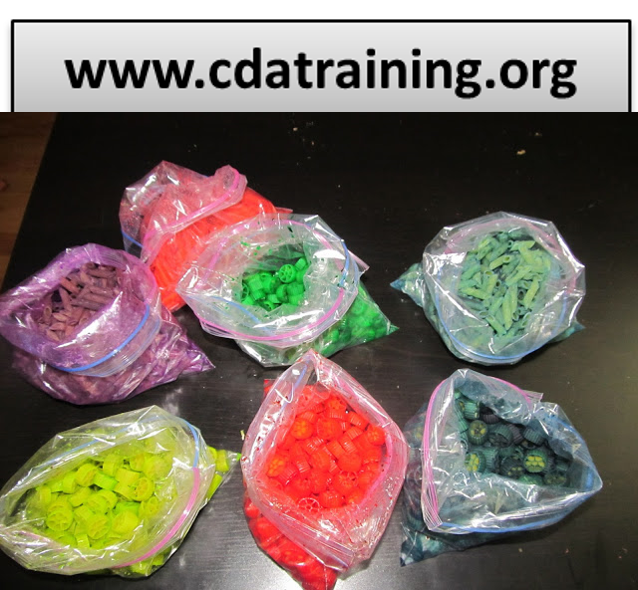
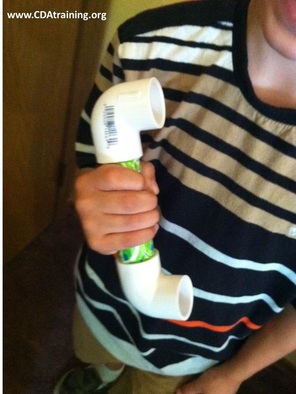
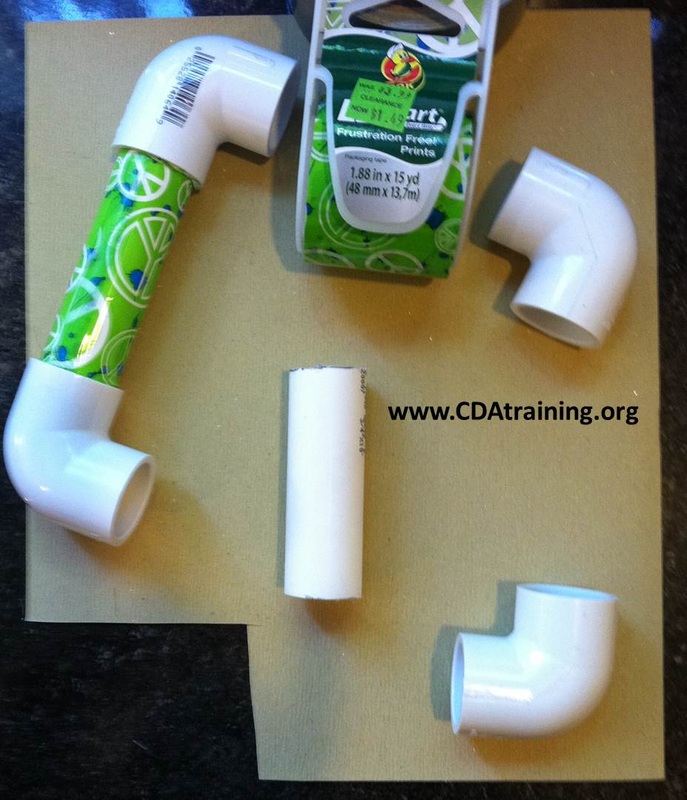
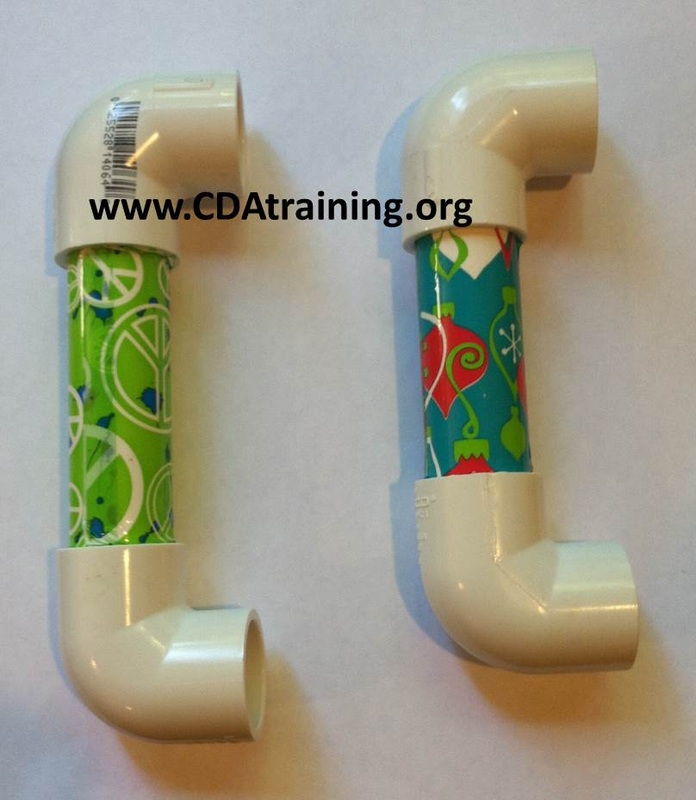
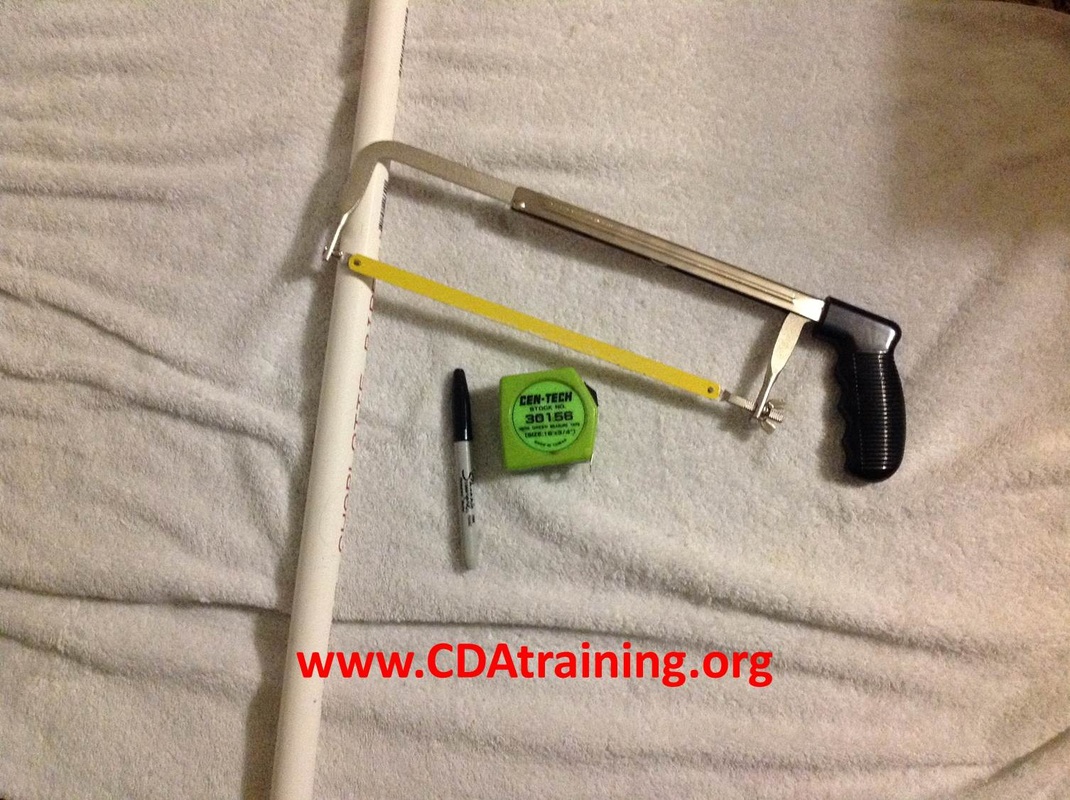
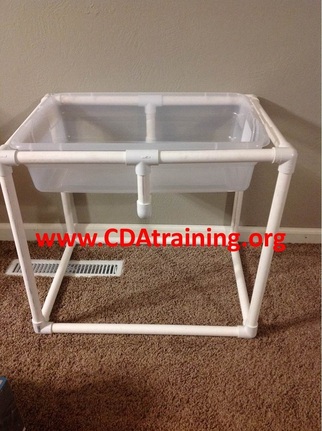
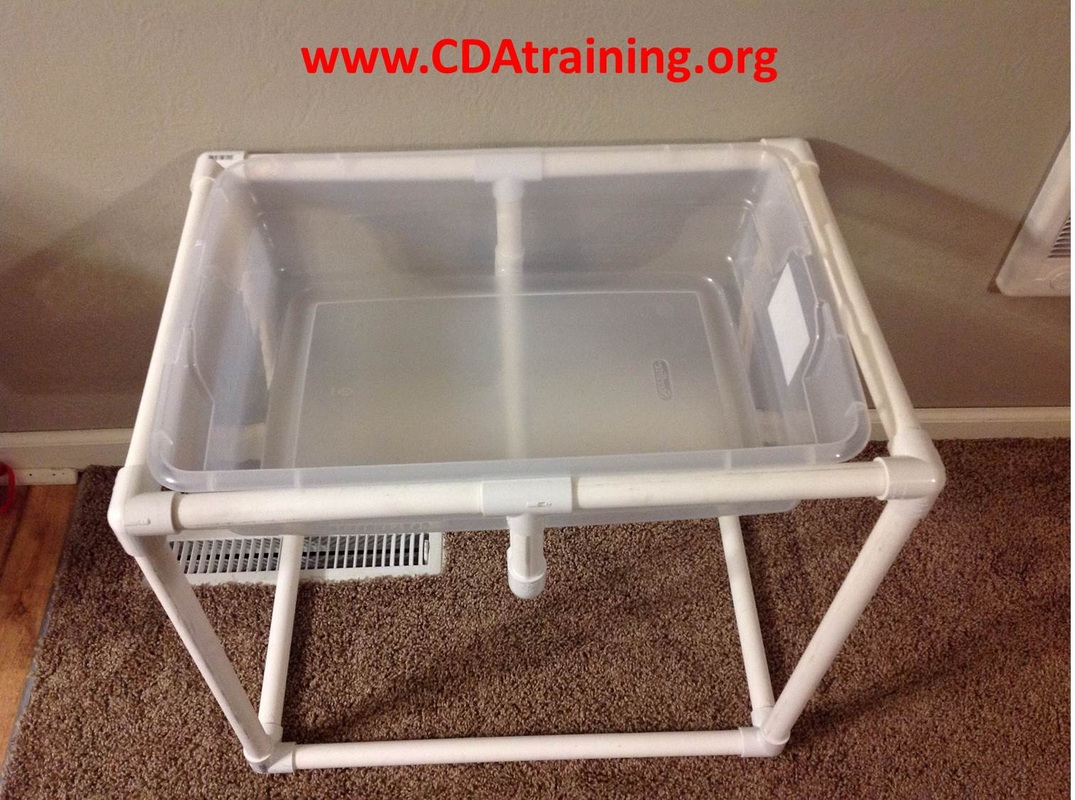
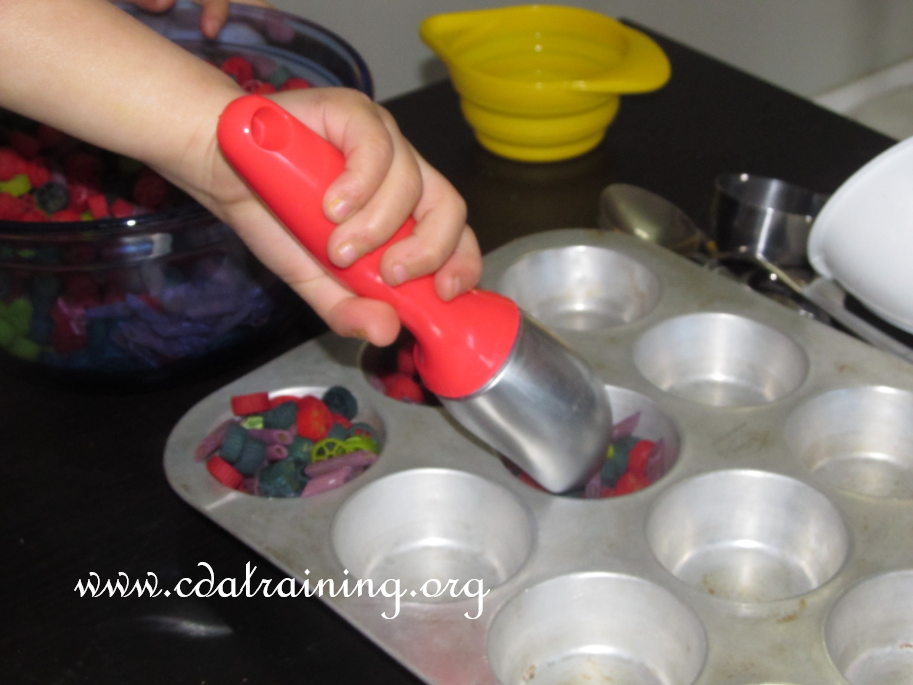
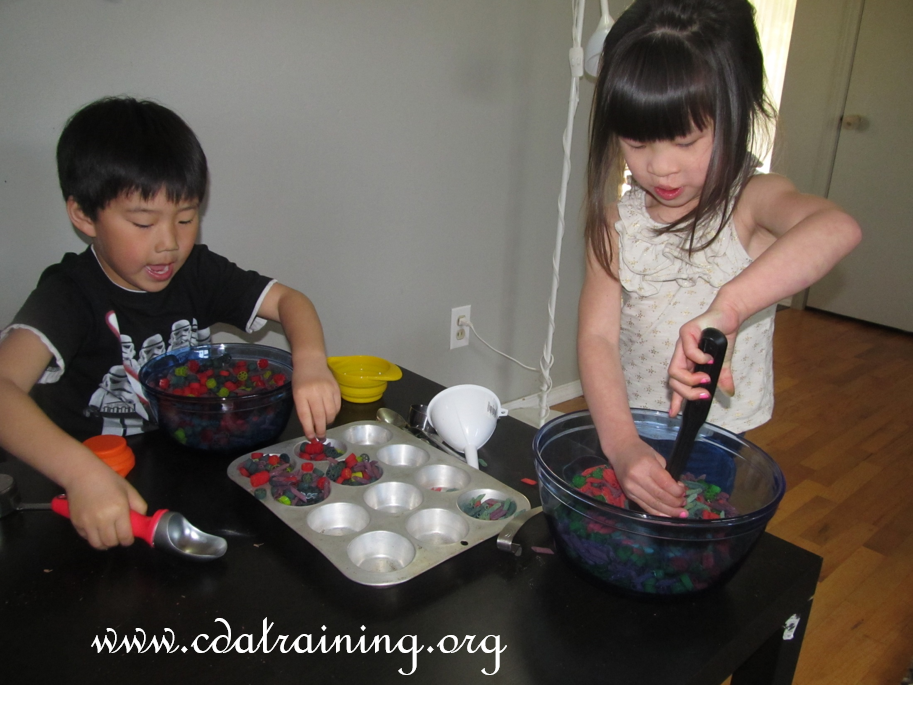
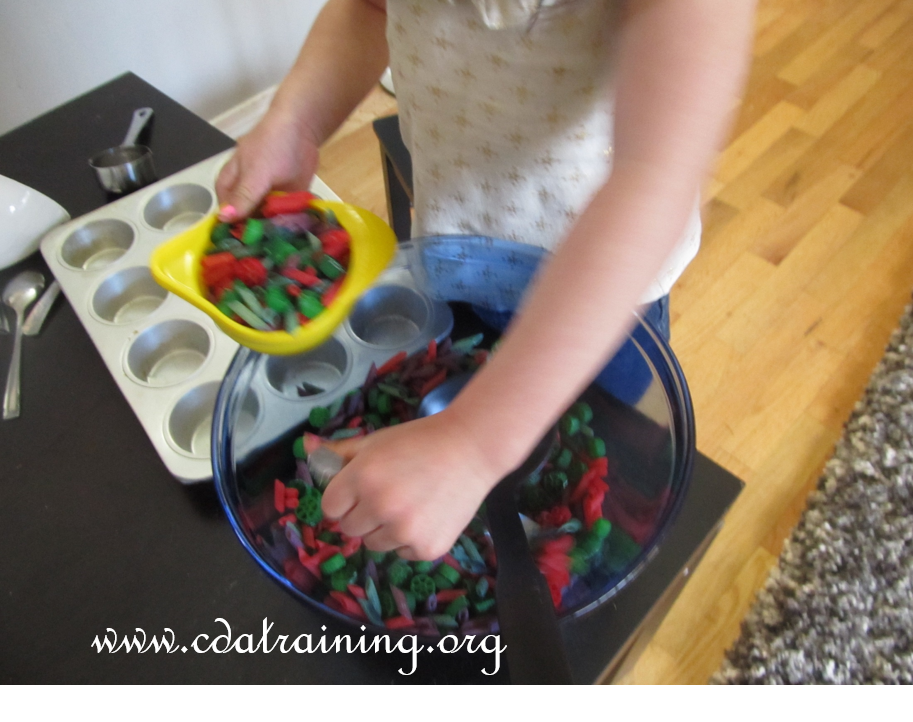
WHat to purchase and What to Cut;Head to the hardware store and buy; 1 Sterilite 28-quart storage box (23-1/2" x 17" x 6") 2 3/4” x 10 foot PVC pipe 8 3/4” PVC side outlet elbow/3-way connector 2 3/4” PVC tee 2 3/4” PVC elbow 1 Hack Saw 1 Tape Measure 1 Sharpie Cutting pipe with a hacksaw is easier than you might think. I was able to complete this project in about an hour. Using your hack saw, cut your PVC into pieces according to this guide. Make sure to use a sharpie when marking your lengths. Cut 2 – at 21” Cut 5 – at 14-1/4” Cut 4 – at 10” Cut 2 – at 3-1/2” Cut 4 – at 18-1/4” **Helpful Hint** Write the length inside of the pipe to make assembly even easier. Assembly is easier than cutting;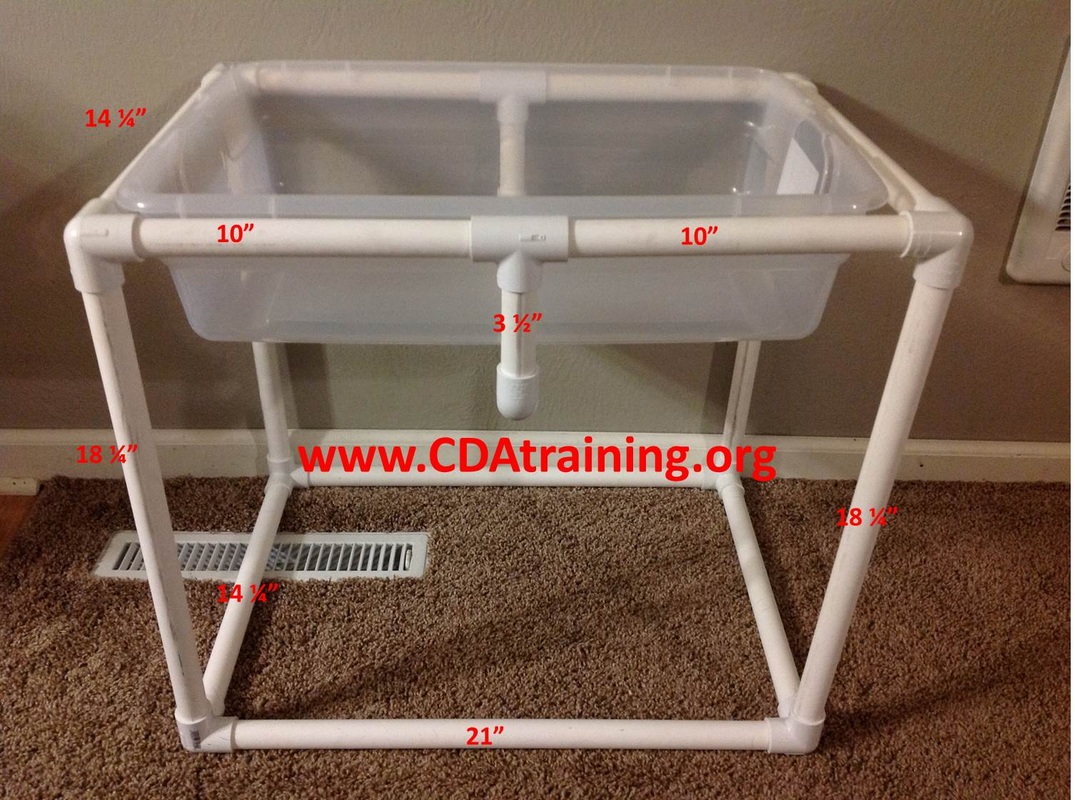 PORTABLE and easy to store;We love this sensory table because it is portable. When the children are done playing with the sensory table, it can be disassembled and stored in the container. This makes it easy to transport and store. 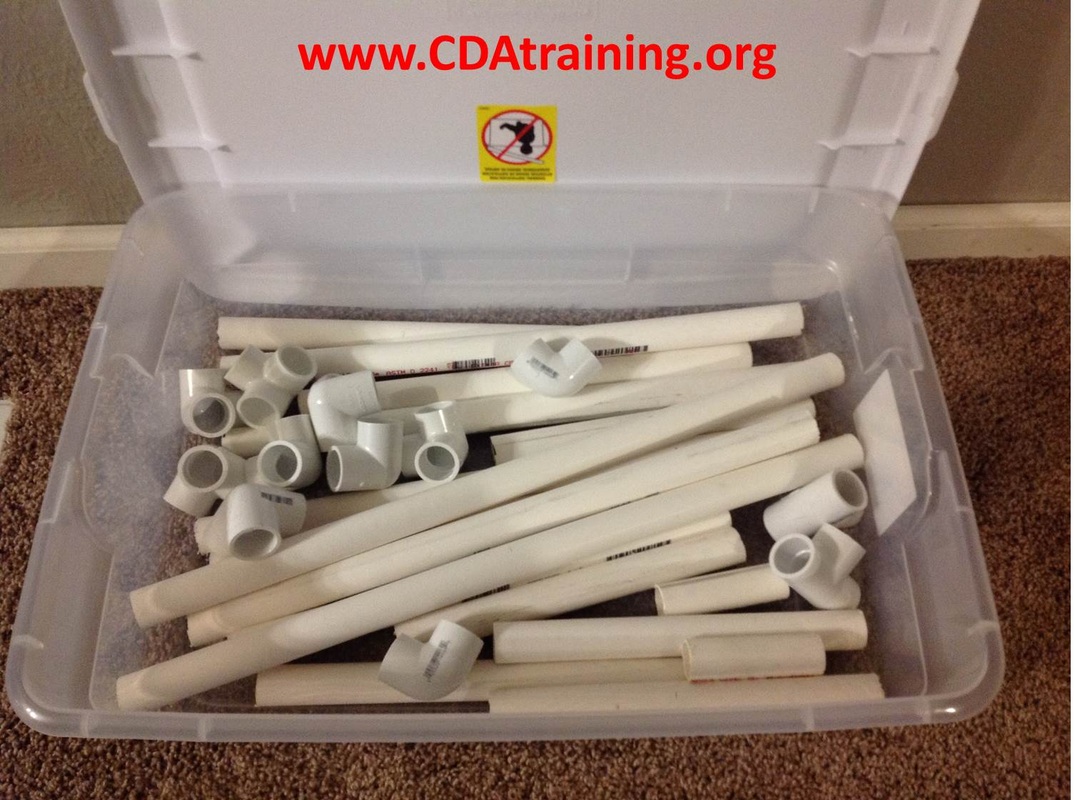 Time to play;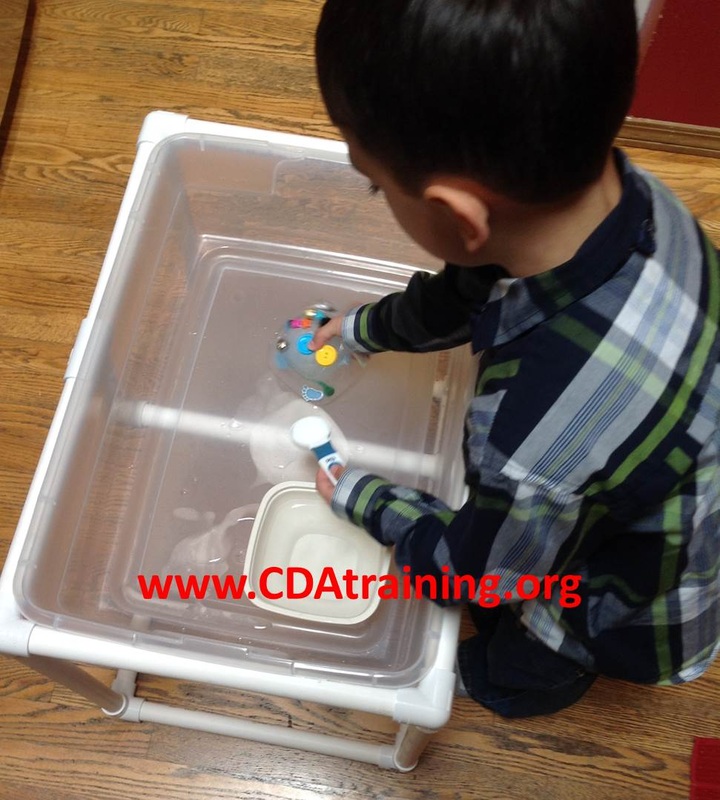 Here is what you will need: Dyed pasta (different varieties), muffin tins, ladles, spoons, measuring cups, ice cream scoop, and whatever else looks like fun to play with. Let you children's imagination take them away. This kept my children busy for an hour (might have been more but they had to go to bed). They loved playing with the dyed pasta! 
Here is what you will need: Dried pasta, food coloring, zip lock bags, and white vinegar. 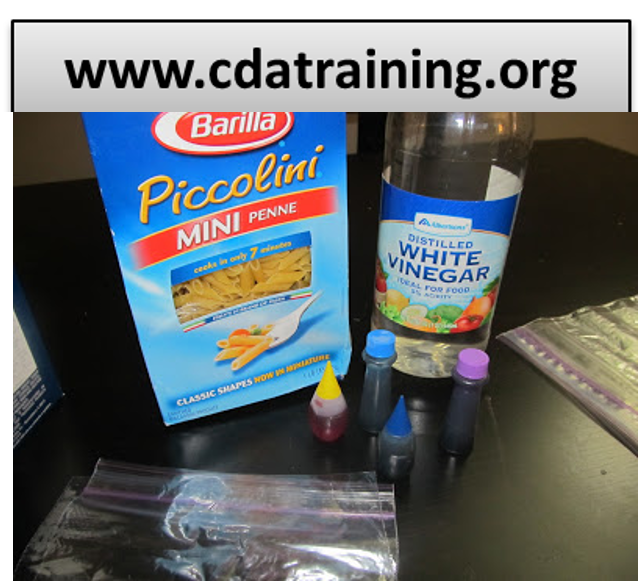
1. Pour some pasta into the bag. 2. Pour in 2 cap fulls of vinegar into the bag. 3. Put about 15 drops of food coloring into the bag. 4. Close the bag and shake it for about 45 seconds. 5. Open the bag and fold back the top and let it dry overnight. 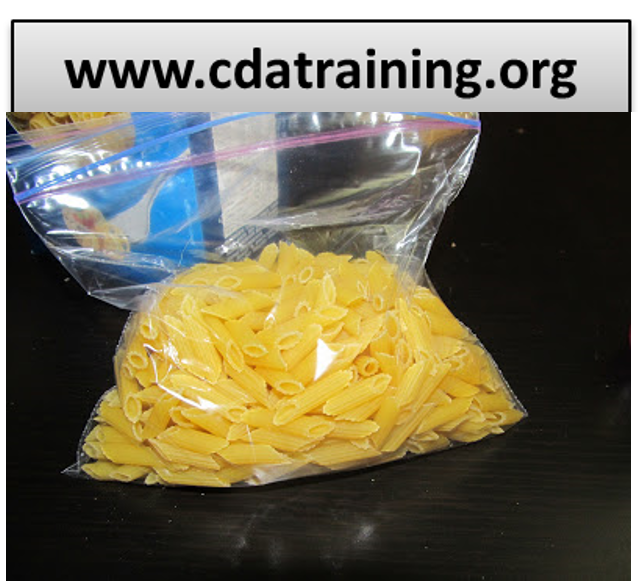
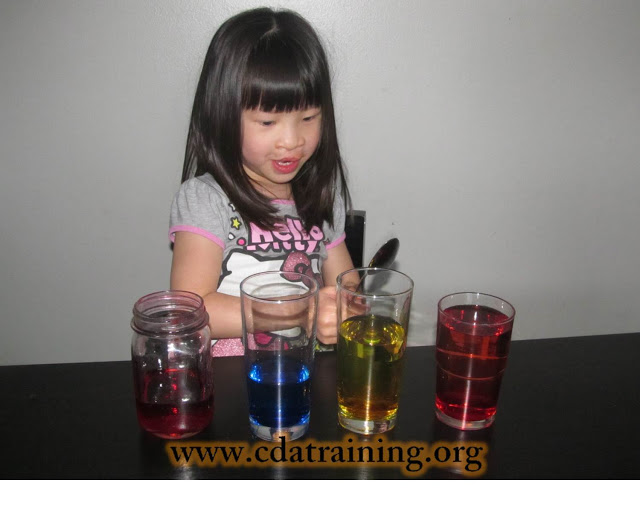
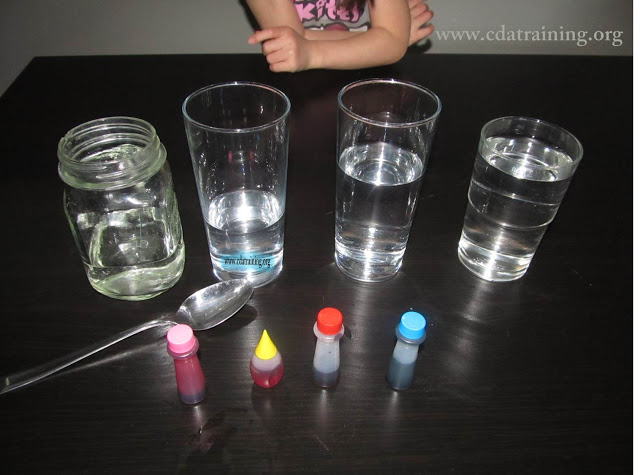
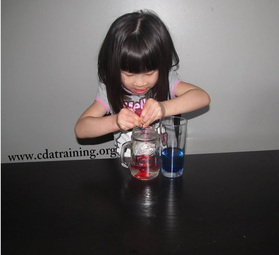
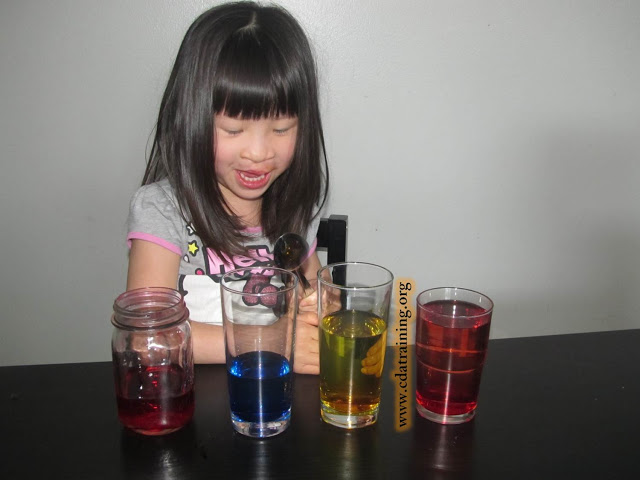
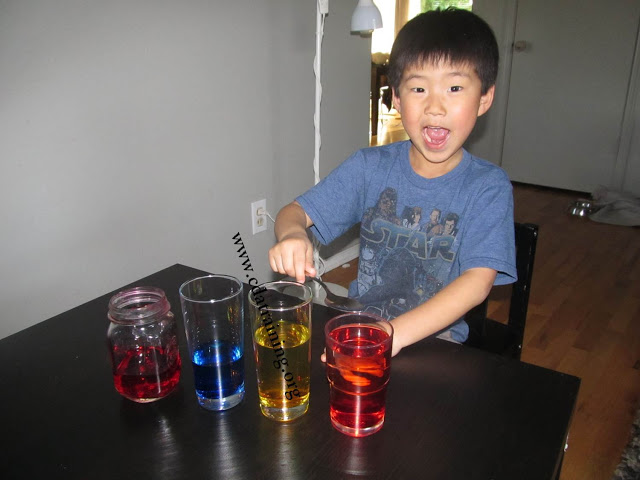
Here is what you will need: Glasses, water, food coloring, spoon. 1. Fill your glasses with different amounts of water. 2. Put several drops of food coloring into each glass. 3. Using the back of the spoon have your children gently tap the top of each glass. 4. Have your children "play" different songs, like "Twinkle, Twinkle" or "Jingle Bells".
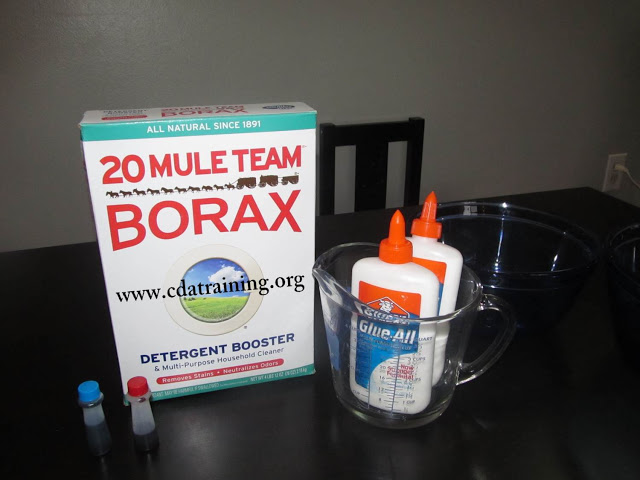
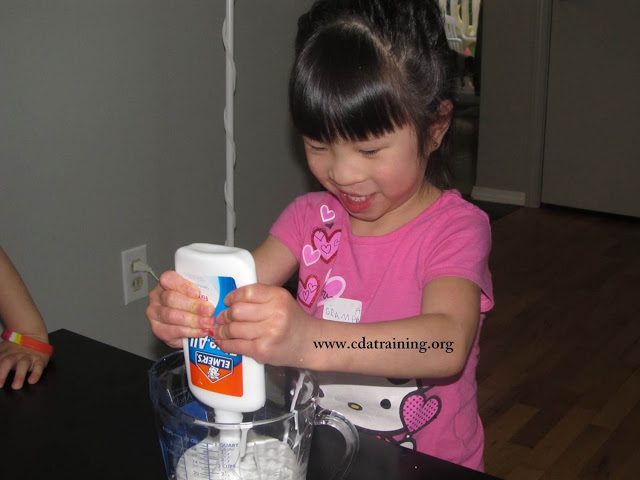
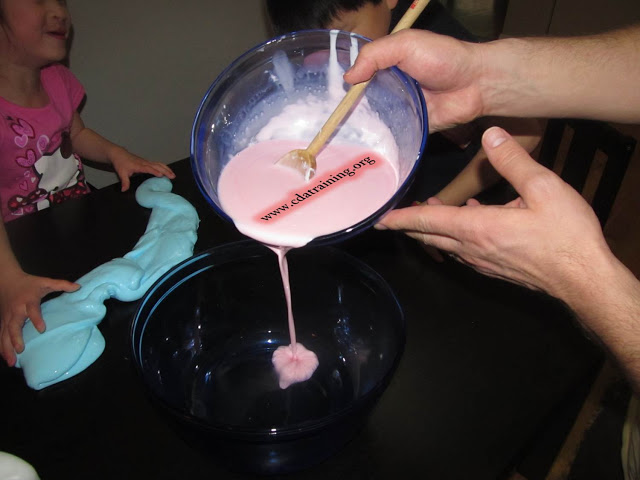
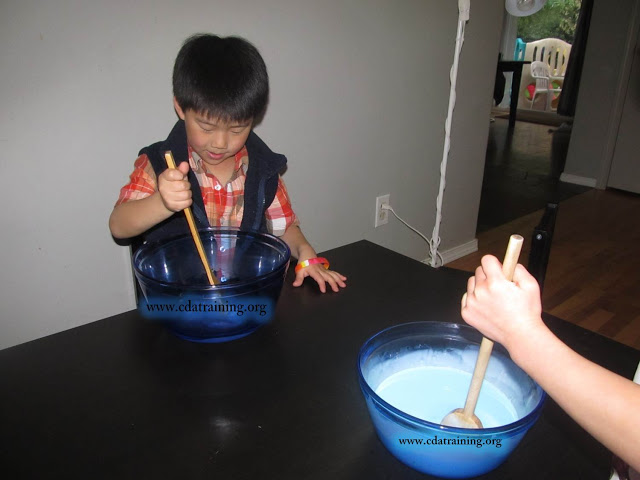
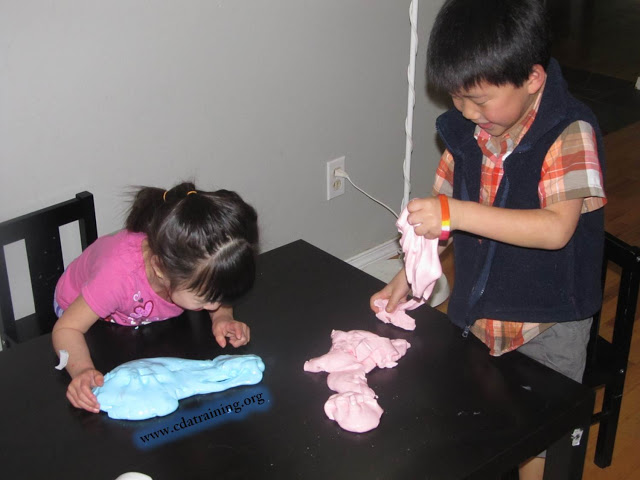
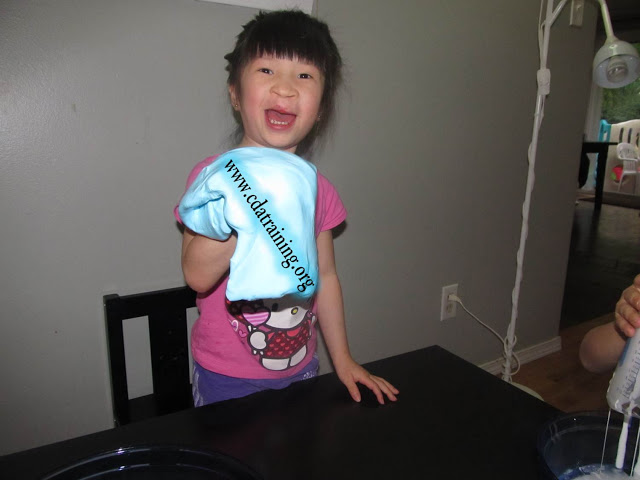
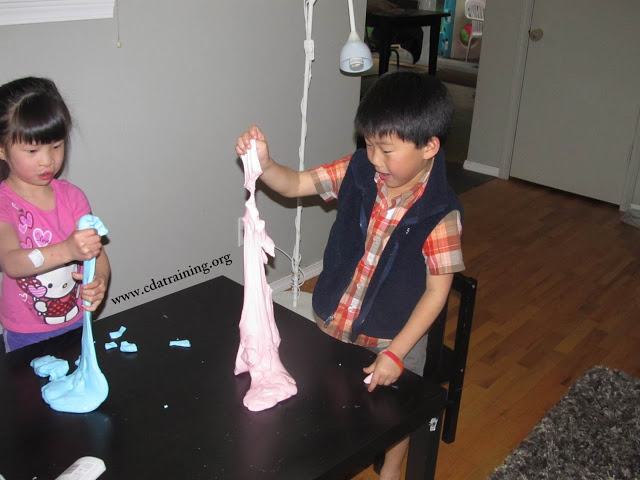
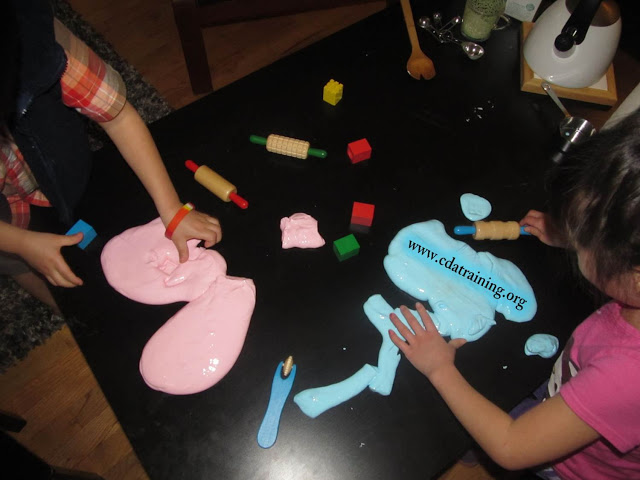
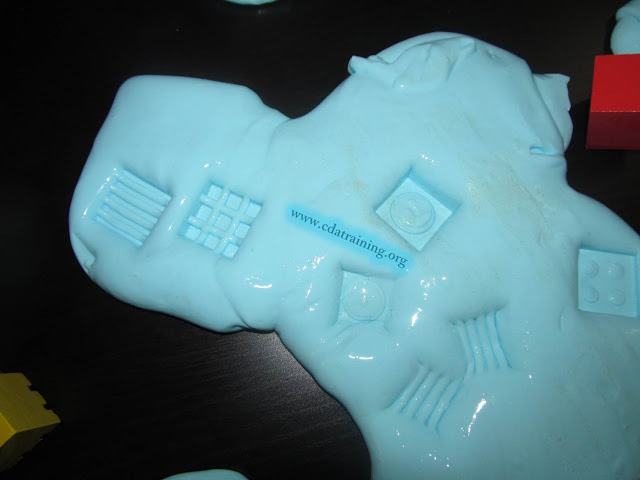
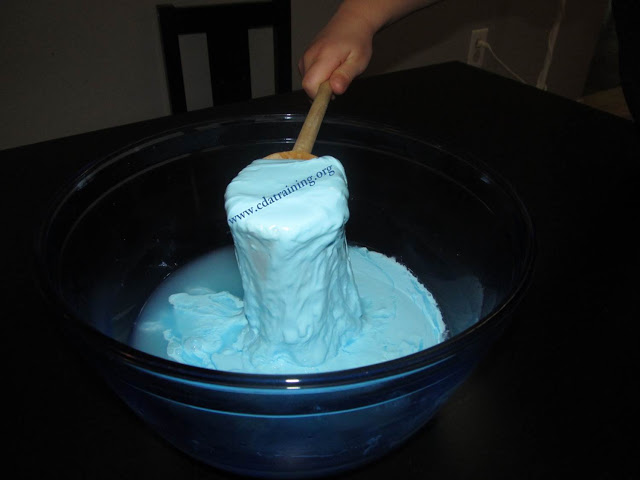
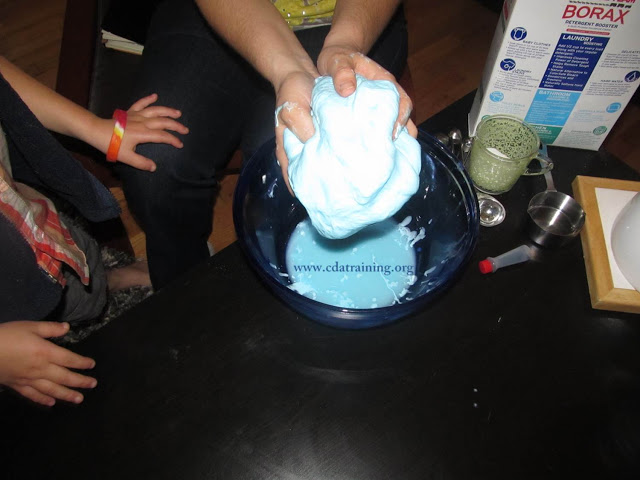
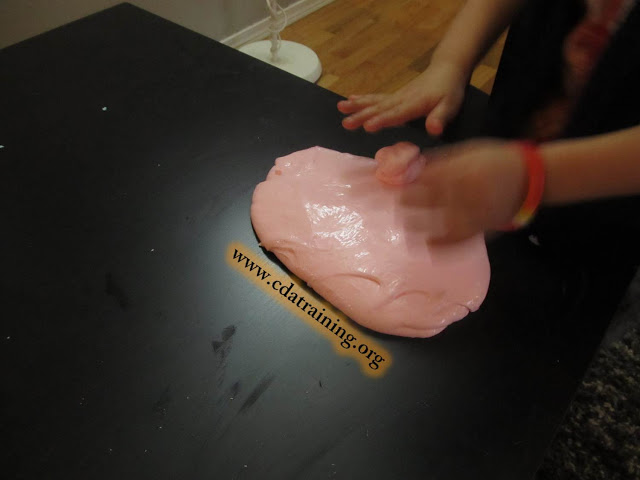
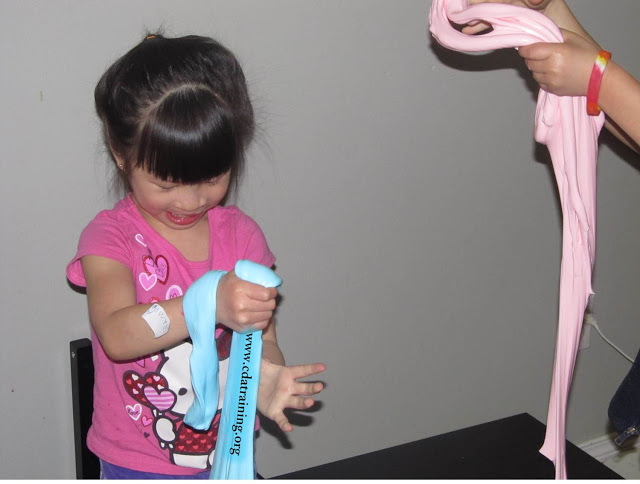
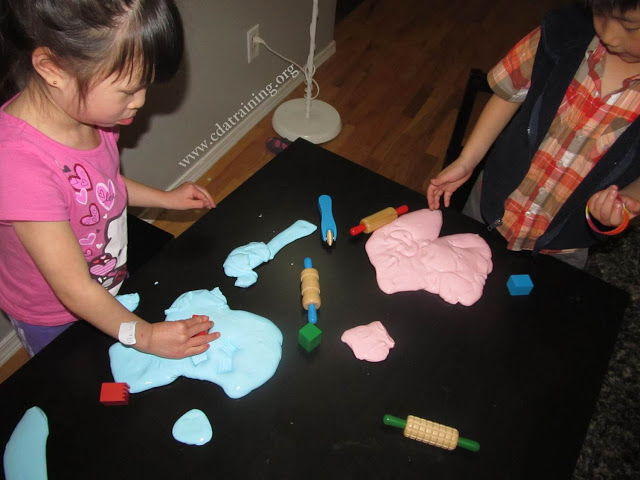
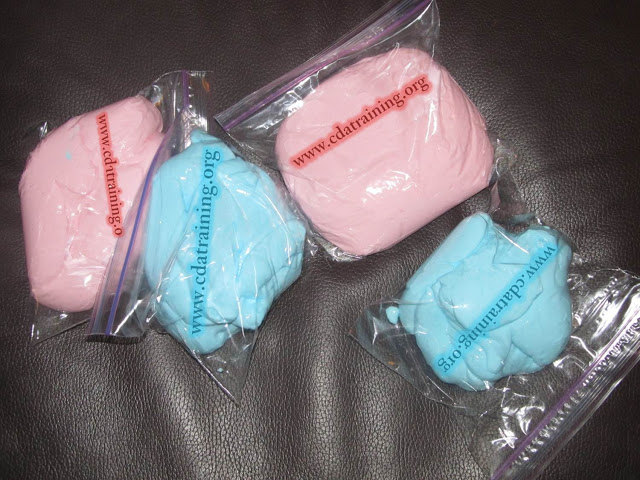
Here is what you will need: warm water, Elmer's glue, food coloring, Borax.
Mixture 1 1 1/2 cups warm water 2 cups Elmer's glue Food Coloring Mixture 2 3 tsp Borax 1 cup warm water 1. Stir Mixture 1 together 2. Stir Mixture 2 together 3. Pour Mixture 1 into Mixture 2 4. No need to stir...when it becomes a glob work it with your hands for a couple of minutes. 5. Take out and play with!!!*
*Store in zip lock bag.
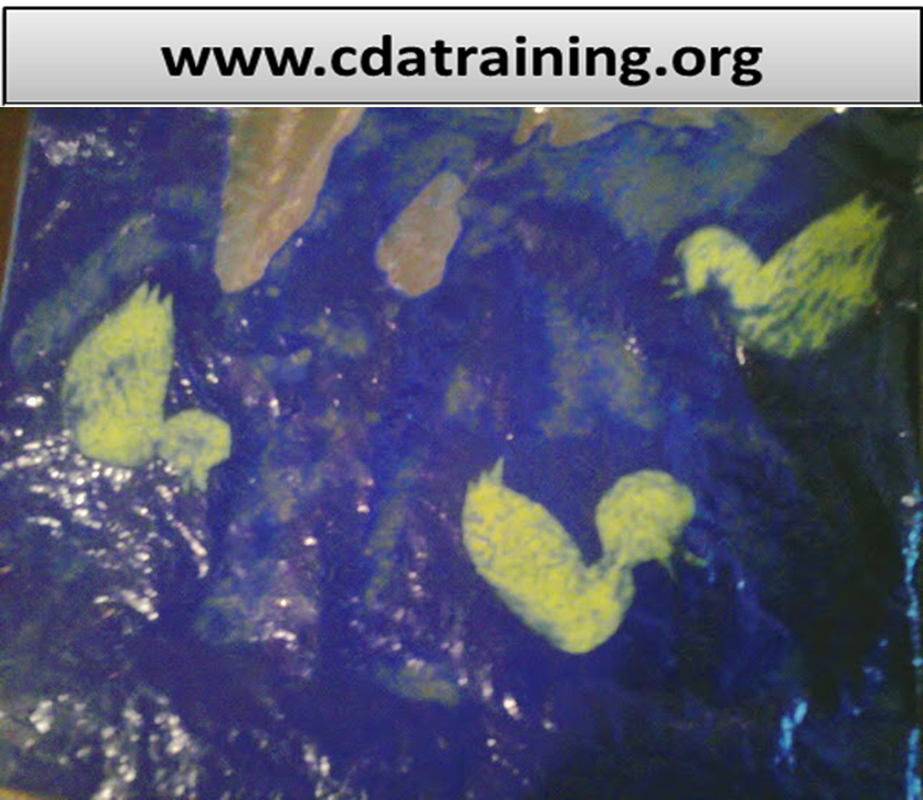
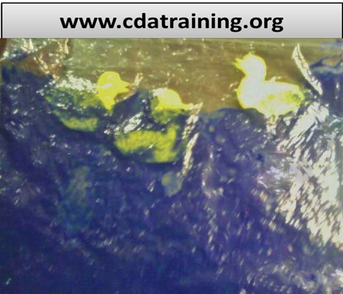
This activity is perfect for infants! It is as simple as cutting out foam ducks and putting them in a baggie of blue paint. This sensory activity stimulates the brain with its bright colors and the cool Squishy feeling of the paint in the bag. Pop it in the fridge for a few minutes on a hot day to help your child cool down while playing.
Materials needed: Blue paint (hair gel can also be used), yellow foam, baggie, tape, scissors. 1. Cut out a few yellow ducks 2. put the ducks in the baggie and fill it with the blue paint or hair gel. 3. seal the bag with a strong piece of tape duct tape works well! It is suggested that your child uses this under adult supervision. |
Sensory PlayArchives
October 2014
Categories
All
|


 RSS Feed
We have provided links where books or educational items that are related to the lesson plan can be purchased on Amazon. These links are intended for the purpose of your convenience to find the referenced item. However, as an Amazon Associate we earn from qualifying purchases that result from clicking on the links.
This website is owned and managed by Successful Solutions Professional Development LLC. Links to online courses that can be purchased are services that are provided by Successful Solutions Training in Child Development, which is a subsidiary of Successful Solutions Professional Development LLC.
This website is owned and managed by Successful Solutions Professional Development LLC. Links to online courses that can be purchased are services that are provided by Successful Solutions Training in Child Development, which is a subsidiary of Successful Solutions Professional Development LLC.
We offer the most comprehensive student support available in a web based learning environment.
E-mail: info@myececlass.com
Phone: (360) 602-0960
Phone: (360) 602-0960
123 Play-and-Learn! Child Care Basics Resources
A child care curriculum blog brought to you by Successful Solutions Training in Child Development.
A child care curriculum blog brought to you by Successful Solutions Training in Child Development.
Address: PO Box 727, Burley, WA 98322-0727 * www.123playandlearn.com
Copyright 2018. Successful Solutions Professional Development LLC. * All Rights Reserved. Updated June 27, 2018
Copyright 2018. Successful Solutions Professional Development LLC. * All Rights Reserved. Updated June 27, 2018

Child Care Courses